
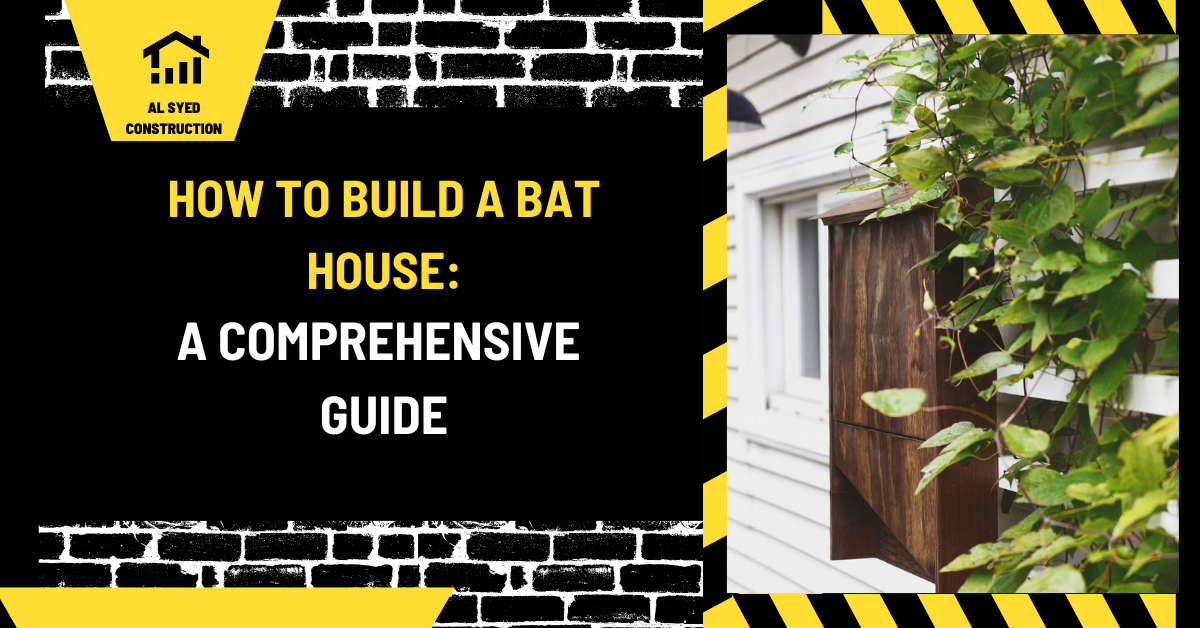
How to Build a Bat House
Overview
Build A Bat House should be understood through its purpose, project setting, controlling documents, and the work it affects. This guide connects the topic to planning, design or scope decisions, coordination, construction checks, and handover rather than treating a label or estimate as a complete answer.
Use the source article's topic details with current project information. Local approvals, safety requirements, engineering decisions, and financial or legal treatment depend on the facts and responsible authority.
Building a bat house can be a rewarding project that benefits both wildlife and your garden. Bats play a crucial role in controlling insect populations, making them valuable allies in maintaining a healthy ecosystem. This guide will walk you through every step of building an effective bat house, from understanding bat species to construction and installation.
- Understanding Bats and Their Needs
- 1.1 The Importance of Bats
- 1.2 Bat Species and Habitats
- Designing Your Bat House
- 2.1 Key Design Features
- 2.2 Internal Structure
- Materials and Tools Required
- 3.1 Essential Materials
- 3.2 Tools Needed
- Step-by-Step Construction Process
- 4.1 Preparing the Wood
- 4.2 Assembling the Bat House
- 4.3 Interior Preparation
- 4.4 Finishing Touches
- Installing and Maintaining Your Bat House
- 5.1 Placement Tips
- 5.2 Maintenance and Care
- 5.3 Troubleshooting Common Issues
- Conclusion
Understanding Bats and Their Needs
1.1 The Importance of Bats
Bats are essential for pest control. They consume large quantities of insects, including mosquitoes and moths, which can help reduce the need for chemical pesticides. Additionally, bats contribute to pollination and seed dispersal, supporting plant health and diversity.
1.2 Bat Species and Habitats
Different bat species have varying habitat requirements. Understanding the species in your area will help tailor the bat house to their needs.
- Little Brown Bat: Prefers cooler climates and roosts in crevices.
- Big Brown Bat: Tolerates warmer temperatures and often roosts in tree cavities.
- Mexican Free-Tailed Bat: Requires warmer, dryer conditions and prefers larger roosting spaces.
Designing Your Bat House
2.1 Key Design Features
A well-designed bat house should mimic natural roosting sites and provide a safe, comfortable environment for bats.
- Size and Dimensions: Larger bat houses are generally more successful. A standard bat house should be at least 24 inches tall, 14 inches wide, and 4 inches deep.
- Materials: Use untreated wood like cedar or pine. These materials are durable and provide adequate insulation.
- Entry and Exit Points: Bats need a narrow entry slot, about 1.5 inches wide, to prevent predators from entering. The house should also have an exit hole or slot to allow bats to leave safely.
2.2 Internal Structure
The interior of the bat house must provide adequate space for bats to roost and cling to.
- Roosting Chambers: Include multiple roosting chambers to accommodate different bat species and provide enough space for colonies.
- Surface Texture: The interior walls should be rough to allow bats to grip securely. You can achieve this by creating grooves or attaching mesh.
Materials and Tools Required
3.1 Essential Materials
Gather the following materials for your bat house construction:
- Wood: Untreated cedar, pine, or plywood.
- Screws and Nails: For assembly.
- Sealant: Non-toxic sealant to protect the wood from the elements.
- Hinges: If building a bat house with a removable roof for easy cleaning.
3.2 Tools Needed
Ensure you have these tools available:
- Saw: For cutting wood to size.
- Drill: For making entry holes and installing screws.
- Screwdriver: For assembling the bat house.
- Measuring Tape: For accurate measurements.
Step-by-Step Construction Process
4.1 Preparing the Wood
Start by cutting the wood to the required dimensions:
- Back Panel: 24 inches by 14 inches.
- Side Panels: 24 inches by 4 inches.
- Front Panel: 24 inches by 6 inches (includes entry slot).
- Roof Panel: 14 inches by 14 inches.
4.2 Assembling the Bat House
- Attach the Sides: Secure the side panels to the back panel using screws or nails.
- Install the Front Panel: Attach the front panel with the entry slot facing downwards.
- Add the Roof: Install the roof panel, ensuring it overhangs to protect the bat house from rain.
4.3 Interior Preparation
- Add Roosting Chambers: Install internal dividers to create multiple roosting chambers.
- Texture the Walls: Use a drill or sandpaper to create a rough surface on the interior walls.
4.4 Finishing Touches
- Seal the Wood: Apply a non-toxic sealant to protect the wood from weather conditions.
- Attach the Bat House to a Post: Mount the bat house on a sturdy post, at least 10-15 feet above ground to keep it away from predators.
Installing and Maintaining Your Bat House
5.1 Placement Tips
Proper placement is crucial for attracting bats:
- Location: Install the bat house in a quiet, undisturbed area with access to food sources such as insect-rich environments.
- Orientation: Position the bat house to receive morning sun and afternoon shade to maintain an optimal temperature.
5.2 Maintenance and Care
Regular maintenance ensures the bat house remains functional:
- Inspect Regularly: Check for signs of wear, damage, or pest infestation.
- Clean Annually: Clean the bat house once a year, preferably in early spring before bats return from migration.
5.3 Troubleshooting Common Issues
- No Bat Activity: If bats are not using the house, verify that it meets their habitat requirements and is located in a suitable area.
- Pest Infestation: Address any pest problems promptly to prevent damage to the bat house and ensure the safety of the bats.
Conclusion
Building a bat house is a fulfilling project that supports bat conservation and enhances your garden's ecosystem. By following this comprehensive guide, you can create a comfortable and effective roosting site for bats, contributing to their protection and benefiting your environment. For further details on bat house construction and other related topics
Scope and meaning
A small build, model, shelter, or hobby project still needs a clear purpose and safe boundary. For build a bat house, decide user, indoor or outdoor setting, expected loads, weather, moving parts, cleaning, and repair. A miniature or animal shelter is not a habitable building design; scaled details behave differently.
Planning inputs to confirm
Choose a stable work surface, suitable materials, and tools for the scale. Measure before cutting and identify sharp edges, dust, fumes, heat, electrical tools, and adhesives. Keep small parts from children and animals. For an outdoor shelter, consider drainage, wind, moisture, sun, cleaning, and placement.
Design choices and trade-offs
Plan the base, walls, openings, roof, joints, and access as one assembly. Check balance, water shedding, snag points, and covered fasteners. Follow product labels and select finishes suitable for intended contact. Appearance should not block ventilation, drainage, access, or safe cleaning.
A practical project sequence
Work from a measured sketch to dry fit, stable base, frame, enclosure, roof, and inspection. Test one component before repeating it. Let adhesives and finishes cure as directed and keep the area ventilated. Do not use the item until connections are secure and loose pieces removed.
Coordination and responsibilities
A home project can affect walls, wiring, plumbing, landscaping, or shared property. Confirm permission and locate services before drilling or digging. If design becomes fixed, changes drainage, or is intended for people, check the applicable review requirements.
Cost and schedule considerations
Budget materials, fasteners, tools, finish, delivery, waste, and replacement parts. A low-cost material may need more finishing or fail sooner outdoors. Compare products at similar size and exposure. Keep an allowance for test cuts and store materials safely.
Quality checks
Check balance, connection tightness, edges, stability, openings, drainage, and weather protection. Follow curing and cleaning instructions. For animal shelters, verify the item cannot tip, trap, overheat, flood, or expose an animal to unsafe coatings.
Risk and long-term use
Keep a repair note. Inspect outdoor items after storms and before seasonal use. Clean and dry the assembly, renew finishes as directed, and replace damaged parts. Recheck fit, shade, ventilation, cleaning, and safe materials for the intended user.
Topic-specific questions
The source outline surfaces points to verify against current project information:
- Understanding Bats and Their Needs. Check the exact location, source revision, reviewer, and whether the point is a definition, design intent, measurement, requirement, or example. Record the answer before procurement or installation if it changes scope, sequence, or acceptance.
- The Importance of Bats. Check the exact location, source revision, reviewer, and whether the point is a definition, design intent, measurement, requirement, or example. Record the answer before procurement or installation if it changes scope, sequence, or acceptance.
- Bat Species and Habitats. Check the exact location, source revision, reviewer, and whether the point is a definition, design intent, measurement, requirement, or example. Record the answer before procurement or installation if it changes scope, sequence, or acceptance.
Project checklist
Before committing to a decision about build a bat house, work through these checks:
- Record location, purpose, project phase, date, and controlling revision.
- Separate verified conditions from assumptions, open questions, allowances, and exclusions.
- Confirm scope, measurement, product or system, interfaces, access, and responsibility.
- Agree who reviews the work, which evidence is required, and when inspection must occur.
- Document approved changes with location, cost or schedule effect, owner, date, and closure.
- Keep tests, photographs, record information, warranties, and maintenance instructions for handover.
Common mistakes to avoid
Do not rely on a broad label, old drawing, generic figure, or verbal field decision when the actual scope can be checked. Confirm the basis, location, version, and reviewer before work is committed. When evidence is incomplete, mark the conclusion provisional and name the next action instead of presenting an assumption as fact.
Frequently asked questions
Is a model plan a building design?
No. A model or hobby project does not prove a full-size or occupied structure is safe or permitted.
What should be checked before cutting?
Measurements, compatible materials and fasteners, tool safety, ventilation, dust control, and a stable surface.
How can a small structure stay stable?
Use a balanced base and secure connections, then check placement, water, wind, and overturning.
Are all finishes safe around animals?
No. Identify the product and follow its label; use materials suited to the intended contact.
When should work stop for review?
If it affects an occupied building, utilities, structural support, drainage, wildlife, or human access.
Related Building Design resources
Continue with How to Build a Cardinal Bird House, How to Build a Wren House, Building a Broiler House. Apply each resource only to its scope and verify project decisions against approved records.
Conclusion
A reliable result for build a bat house comes from clear scope, current evidence, coordinated decisions, and documented checks. Obtain qualified review where safety or compliance is involved, and keep the approved record available for construction and future maintenance.



Leave a Reply
Want to join the discussion?Feel free to contribute!