
Platform Framing: Structure, Sequence, and Details
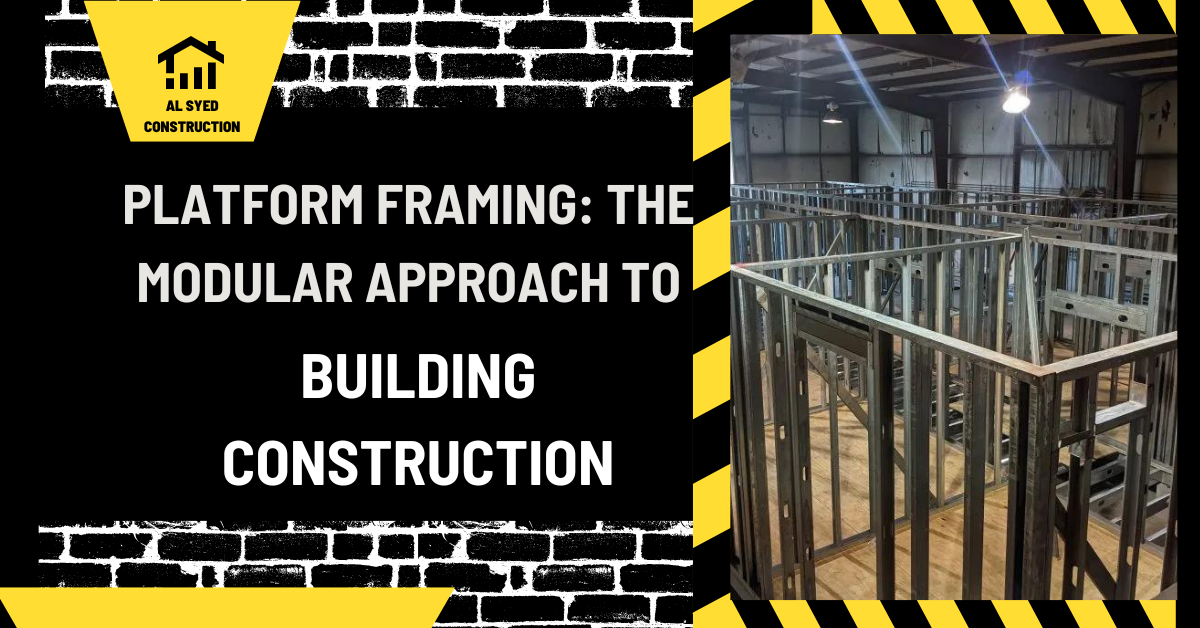
Platform framing is a wood-building method in which each story is framed as a working platform before the walls of the next story are erected. The floor deck creates a stable surface for layout and wall assembly, and the sequence repeats upward. The method is widely used for low-rise residential and some commercial construction because it can be adapted to many plans and assembled with familiar materials and crews.
Platform framing is sometimes called modular because the work proceeds in repeatable stages, but it is not the same as factory-built volumetric modular construction. This article explains the framing sequence, components, load path, coordination needs, and construction checks. Structural sizes and connections depend on the engineered plans, local code, material grade, span, loading, and site conditions. Use the approved drawings and qualified design professionals for project decisions.
How platform framing works
The process generally begins with the first-floor platform supported by the foundation or a lower-level structure. Floor joists or trusses are installed with required blocking, rim elements, and sheathing. The platform provides a work surface on which exterior and interior walls can be laid out, framed, raised, and connected. After the wall bracing and sheathing are complete as designed, the next floor assembly is installed, creating another platform for the story above.
The sequence makes it easier to work on a level deck than to frame a full-height building from the ground. It also creates a repeated set of interfaces: foundation to first floor, floor to wall, wall to upper floor, and wall to roof. Those interfaces need coordinated dimensions, connectors, and load transfer details. The geometry of the framing is not a substitute for structural design; a simple-looking wall may still be part of the building’s lateral system.
Platform framing differs from volumetric modular construction, where rooms or building sections are assembled in a factory and transported to the site. It can, however, be combined with prefabricated floor cassettes, wall panels, roof trusses, or other assemblies. For that distinction, compare the overview of stick-built construction with the broader discussion of modular building design.
Main components of a platform-framed building
The foundation transfers building loads to the ground. A sill plate or other approved connection attaches the wood framing to the foundation. Floor joists, beams, trusses, rim boards, blocking, and subfloor sheathing form the first platform. The walls above use studs, plates, headers, sheathing, and connectors arranged according to the plans. The roof system can use rafters or trusses, with roof sheathing and the selected weather-resistive assembly.
Sheathing can contribute to the structural system when the drawings assign it a role in resisting lateral loads. Its thickness, panel layout, edge support, fastener type, spacing, and boundary connections should follow the engineered plans. Wall openings for doors and windows interrupt the framing and may require headers, king studs, jack studs, hold-downs, or other details. The correct design depends on the span, loads, wall configuration, and governing code.
Moisture-control, air-sealing, insulation, flashing, and interior finish layers complete the building enclosure but should not be confused with the primary frame. They need to be coordinated with framing so that cavities, penetrations, and transitions do not compromise performance. The design should show how water drains around openings and how the wall connects to floors, foundation, and roof.
| Framing element | Role in the assembly | Coordination point |
|---|---|---|
| Floor joists or trusses | Support floor loads and span between bearing points | Span, bearing, openings, vibration criteria, services, and blocking |
| Rim elements and blocking | Close floor edges and help transfer forces where designed | Connection to walls, floor diaphragm, and exterior enclosure |
| Wall studs and plates | Carry wall, floor, and roof loads as designed | Stud spacing, openings, bracing, fireblocking, and service penetrations |
| Headers and opening framing | Transfer loads around doors, windows, and other openings | Engineer-approved sizes, supports, fastening, and rough opening dimensions |
| Sheathing and connectors | May provide structural resistance and support enclosure layers | Panel layout, fastening schedule, edge support, and hold-downs |
Understand the continuous load path
A building needs a continuous path that carries gravity and lateral forces from roof and floors through walls, connectors, and foundation to the ground. Platform framing creates story-by-story transitions where that path must remain clear. Floor joists bear on walls or beams; wall plates and studs carry loads to the lower story; and approved connectors tie framing elements together. The engineer determines the required members and connections for the actual building.
Wind and seismic forces can create uplift, shear, and overturning demands. Sheathing, diaphragms, collectors, blocking, hold-downs, straps, and anchorage may be part of the lateral system. A contractor should not move a connector, change a fastener, or remove blocking because the area appears crowded. Changes need review by the structural designer because small details can affect the intended load path.
Openings and large rooms can concentrate forces or interrupt walls that otherwise resist lateral loads. Coordinate window and door sizes, garage openings, stairwells, and service chases before framing starts. If the architectural layout changes, check whether the structural drawings and connector schedule must also change.
Typical sequence from foundation to roof
- Verify the foundation: Check approved dimensions, elevations, anchors, bearing locations, and required inspections.
- Build the first-floor platform: Install the specified sill connection, joists or trusses, rim members, blocking, and subfloor.
- Frame and brace walls: Lay out openings, frame walls, apply specified sheathing, and install temporary bracing before raising.
- Connect each story: Secure walls to floor framing and complete the designed structural ties before loading the next platform.
- Repeat floor and wall assembly: Install upper floors and walls in sequence, maintaining temporary stability and inspection access.
- Frame the roof: Set rafters or trusses according to the plans, brace them, and complete required roof sheathing and connections.
- Complete enclosure and services: Install water and air-control layers, windows, doors, insulation, fire protection, and building systems.
The exact sequence can change with the building design, prefabricated components, weather, crane or delivery access, and the contractor’s means and methods. The project schedule should name inspection points and identify when temporary bracing can be removed.
Coordinate mechanical, electrical, and plumbing work
Platform framing provides cavities that can contain building services, but the routes must be coordinated with structural members. Floor joists and trusses may have designated openings or zones for ducts, pipes, and wiring. Notching or drilling outside the details can weaken a member. The design team should coordinate larger ducts, vertical risers, exhaust paths, plumbing stacks, and equipment locations before the framing package is released.
Plan access to valves, dampers, junction boxes, cleanouts, and equipment. Service routes should not block required fire-resistance details or compromise air and water control layers. Fireblocking, draftstopping, firestopping, and protection around penetrations depend on the adopted code and assembly. Keep inspection access available until required checks are complete.
Coordination can also reduce unnecessary framing changes. A shared model or overlay drawing helps identify conflicts between joists, beams, stairs, mechanical runs, and openings. If field conditions require a change, record it and obtain approval before cutting structural material.
Quality, safety, and moisture protection
Before framing, confirm lumber or engineered products match the approved specifications, grade, dimensions, and moisture conditions. Store materials off the ground, protect them from prolonged wetting, and keep labels or identification visible. Inspect for damage or defects that could affect installation and follow the supplier’s handling requirements.
During construction, check layout, plumb, alignment, fastening, bearing, blocking, connectors, and bracing at the stages shown in the inspection plan. Framing that will be concealed should be reviewed before insulation and finishes close the assembly. Record corrections, approved substitutions, and inspections. Maintain temporary bracing until the permanent system is complete as required by the contractor’s plan.
Water management during construction is important. Protect subfloors and wall framing from standing water, provide temporary drainage or covers as appropriate, and allow materials to dry before enclosing when required. Install flashing and water-resistive layers in a shingle-like drainage sequence as detailed. Moisture control includes roof and window detailing, foundation drainage, and air sealing; a single wrap or coating cannot correct a poor transition.
Advantages and trade-offs
Platform framing can use familiar materials and labor, support a wide range of floor plans, and provide a stable platform for each story. Repeated story sequencing can make layout and inspection easier. Its adaptability can be useful where a design needs field adjustments, although changes still have to comply with the plans and code.
The approach also has limits. Much of the work occurs on the site and is exposed to weather. Labor availability and workmanship affect schedule and quality. Site storage and waste management need planning. Long runs, large openings, complex building services, or tight tolerances may call for engineered components or prefabricated assemblies. A project team can compare conventional framing with off-site assemblies as discussed in the guide to prefabricated construction methods.
Common mistakes to avoid
- Changing openings after structural review: Recheck headers, shear walls, collectors, and connectors before revising the layout.
- Cutting a joist or truss for a service route: Follow approved openings and get written design direction for any change.
- Removing temporary bracing too soon: Keep it in place until the permanent system is installed and verified.
- Ignoring the floor-to-wall interface: Coordinate bearing, fastening, fire details, and enclosure layers at every story.
- Closing work before inspection: Schedule hold points for framing, connectors, penetrations, and concealed assemblies.
- Letting framing stay wet: Protect materials, manage drainage, and verify drying before closing assemblies when required.
Conclusion
Platform framing builds a structure one supported floor at a time. Its clarity and adaptability come from a deliberate sequence, but safe performance still depends on engineered members, connections, bracing, and a continuous load path. Coordinate openings and services before work, protect materials from moisture, and inspect concealed details at the right time. When each floor, wall, and roof assembly follows the approved plans, platform framing can provide a practical framework for a durable building.

Leave a Reply
Want to join the discussion?Feel free to contribute!