
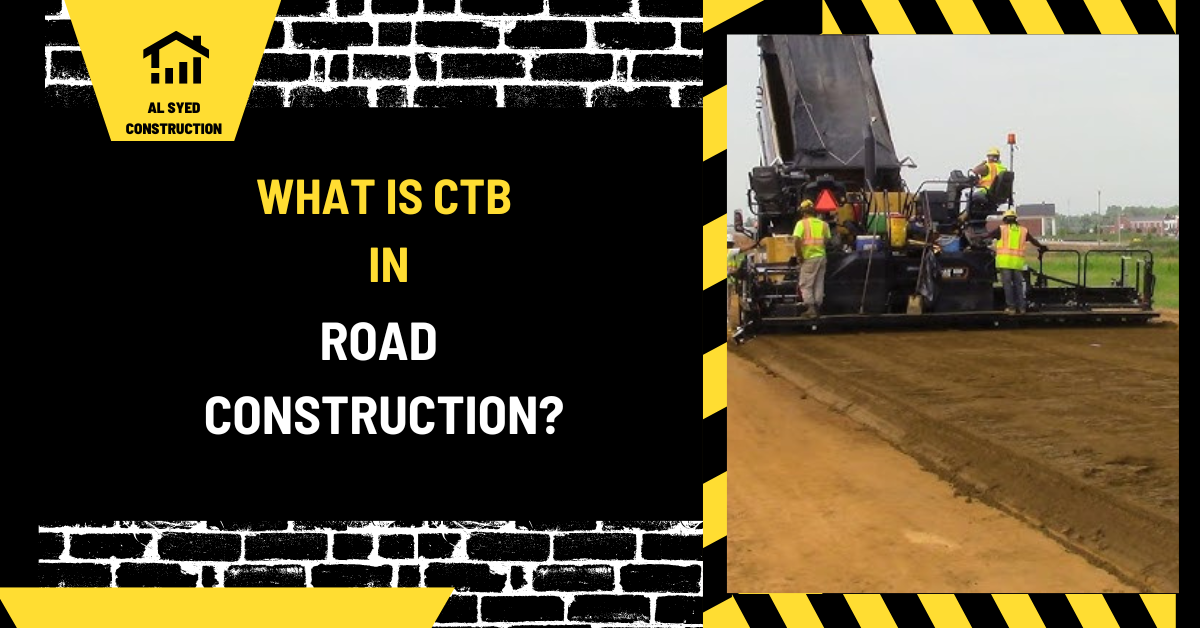
What is CTB in Road Construction
This article focuses on ctb in road construction. The practical guidance explains how the topic affects scope, materials, field coordination, quality checks, and maintenance. Decisions depend on the site, intended use, approved documents, adjacent features, and the people responsible for design and construction. Confirm project-specific engineering, contract, and current local requirements with the responsible professional.
Definition of Cement Treated Base (CTB)
Cement Treated Base (CTB) refers to a pavement layer that consists of a mixture of aggregate materials and portland cement. The cement acts as a stabilizing agent, binding the aggregates together and creating a solid, load-bearing foundation. This base layer is designed to support the subsequent layers of the road surface and distribute loads effectively, thereby enhancing the overall performance of the roadway.
Components of CTB
1. Aggregate Materials
Aggregates are the primary components of CTB and typically include:
- Crushed Stone: Provides strength and stability to the mixture.
- Gravel: Adds volume and helps to improve workability.
- Sand: Fills voids and contributes to the mixture’s overall stability.
The selection of aggregate materials depends on the specific requirements of the project, including load-bearing capacity and drainage considerations.
2. Portland Cement
Portland cement is the binder used in CTB, and its role is to:
- Hydrate and Harden: When mixed with water, cement hydrates and forms a solid mass, binding the aggregate particles together.
- Improve Strength: Cement significantly increases the compressive strength of the base layer, providing a robust foundation for the road surface.
3. Water
Water is essential for the hydration process of cement. The correct amount of water must be used to achieve optimal mixing and curing of the CTB. Too much water can weaken the mixture, while too little can impede the hydration process.
Application Process of CTB
1. Material Preparation
The first step in CTB application involves preparing the materials:
- Aggregate Sizing: Ensure that the aggregates are properly graded to achieve the desired mix design.
- Cement Proportioning: Accurately measure the amount of portland cement required based on the project specifications.
- Water Measurement: Determine the appropriate water content to achieve the desired consistency of the mix.
2. Mixing
CTB mixing can be performed using:
- Central Mixing Plants: These facilities mix the cement, aggregates, and water to produce a uniform mixture.
- Road-Mixing Equipment: For smaller projects, mixing can be done directly on-site using specialized road-mixing equipment.
The mixing process involves combining the cement and aggregates thoroughly before adding water. The mixture should be homogeneous and free of lumps.
3. Placement and Compaction
Once mixed, the CTB must be placed and compacted:
- Spreading: The mixture is spread evenly over the prepared subgrade using grading equipment.
- Compaction: Compaction is achieved using vibratory rollers or pneumatic rollers to ensure a dense, stable base. Proper compaction is critical for achieving the desired strength and performance of the CTB.
4. Curing
Curing is a vital step that involves maintaining adequate moisture and temperature conditions to ensure proper hydration and hardening of the cement. Methods include:
- Water Curing: Applying water to the surface to keep it moist.
- Curing Compounds: Using chemical curing compounds that form a protective film over the surface to retain moisture.
Benefits of CTB
1. Enhanced Structural Capacity
CTB significantly improves the structural capacity of the road by providing a strong, load-bearing base. This enhances the road’s ability to support heavy traffic loads and reduces the likelihood of structural failure.
2. Improved Load Distribution
The cement-treated base layer distributes loads more effectively across the subgrade, minimizing the risk of deformation and extending the service life of the road.
3. Increased Durability
CTB is highly resistant to erosion, moisture infiltration, and freeze-thaw cycles, making it a durable option for various environmental conditions. This reduces the frequency of maintenance and repair work.
4. Cost-Effective Solution
CTB provides a cost-effective solution for road construction by reducing the need for frequent maintenance and extending the life of the pavement. The initial investment in CTB can result in significant long-term savings.
5. Faster Construction
The use of CTB can speed up the construction process due to its rapid setting and curing characteristics. This helps to reduce project timelines and minimize disruptions to traffic.
Best Practices for CTB Implementation
1. Accurate Material Selection
Choose high-quality aggregates and portland cement to ensure the performance and longevity of the CTB. The material properties should meet the specifications outlined in the project requirements.
2. Proper Mixing Proportions
Adhere to the recommended proportions of cement, aggregates, and water to achieve the desired strength and workability. Variations in proportions can affect the performance of the CTB.
3. Effective Compaction
Ensure thorough compaction of the CTB layer to achieve the desired density and stability. Inadequate compaction can lead to weakened areas and reduced load-bearing capacity.
4. Adequate Curing
Implement effective curing practices to maintain moisture levels and promote proper hydration of the cement. This is essential for achieving optimal strength and durability.
5. Regular Quality Control
Conduct regular quality control checks throughout the CTB application process to monitor material quality, mixing consistency, and compaction effectiveness. Address any issues promptly to ensure a high-quality finished product.
Challenges and Considerations
**1. Material Variability
Variability in aggregate quality or cement composition can affect the performance of CTB. Ensure consistent material quality to maintain uniformity and reliability.
**2. Environmental Factors
Weather conditions, such as temperature and humidity, can impact the curing process and overall performance of CTB. Plan and adapt construction activities based on environmental conditions to ensure optimal results.
**3. Cost Management
While CTB offers long-term cost savings, careful management of material and construction costs is essential to stay within budget. Consider all factors, including material quality and construction efficiency, when planning the project.
**4. Maintenance Needs
Although CTB reduces the frequency of maintenance, periodic inspections and upkeep are still necessary to ensure the continued performance of the road. Address any issues promptly to prevent further deterioration.
Conclusion
Cement Treated Base (CTB) is a vital component in road construction that provides a robust and durable foundation for roadways. By understanding its composition, application process, benefits, and best practices, we can ensure the successful implementation of CTB and achieve optimal performance in our road construction projects. For more detailed information on CTB and its application, please refer to this resource.
Define the scope and expected result
Begin with the actual question behind ctb in road construction. Identify whether the work is new construction, repair, measurement, status checking, service planning, or maintenance. State the location, limits, intended use, and expected result in plain language. This distinction matters because a general definition cannot approve a site detail, a rough estimate cannot replace a written scope, and a map observation cannot confirm the status of every work zone.
For the road corridor, pavement section, shoulder, curb, drainage, utilities, and tie-ins, mark what is included, what remains in place, and where another owner or trade takes over. Capture the condition before work, note access that must remain available, and identify open decisions. Where a boundary, elevation, term, or responsibility is uncertain, record the question and obtain direction before ordering material or changing the field condition.
Confirm the controlling information
Before selecting a method, review the current alignment, profile, cross-section, survey control, traffic stage, utilities, and project revision. Check that the plans, quantities, and communications refer to the same revision and location. Record the source and date of information that can change, such as a field measurement, traffic condition, service request, or local requirement. Separate verified facts from assumptions so a later decision can be traced to its basis.
Use a site walk to compare the documents with actual conditions. Photograph interfaces, identify nearby utilities and drainage features, and note constraints on equipment, storage, work hours, and public access. If the information is incomplete, determine whether a survey, test, agency response, or qualified design review is needed. Do not make an unapproved substitution simply because a detail is difficult to build as drawn.
Compare options as complete systems
Evaluate the approved earthwork, base, binder, wearing surface, edge treatment, and drainage details. Compare function, supporting layers, edges, interfaces, drainage, installation method, inspection, and maintenance together. Product labels and familiar field terms do not establish that two assemblies are equivalent. Check approved submittals and product instructions, then ask the responsible professional to review a proposed alternative that could affect design intent, performance, appearance, or acceptance.
For the road corridor, pavement section, shoulder, curb, drainage, utilities, and tie-ins, weigh the site conditions and owner needs rather than choosing only by appearance or a headline estimate. Consider traffic, weather, water, access, maintenance capacity, and future work. If a product is unavailable or a method changes, document the replacement, its compatibility, and any revised inspection or schedule requirement. This gives the owner a reasoned comparison without assuming that the most expensive option is automatically best.
Plan the work sequence and handoffs
Build the sequence around survey control, utility coordination, grading, drainage, subgrade, specified layers, surface work, markings, and restoration. Identify prerequisites, access, equipment, materials, inspection hold points, and the person responsible for each handoff. Schedule work that will be concealed for review before the next operation begins. Tell the next trade what has been completed and what must remain protected. A coordinated sequence reduces rework and makes it easier to identify the source of a defect.
Allow the plan to respond to real conditions without losing control of the change. Weather, deliveries, utilities, ground conditions, public access, and approvals may shift the sequence. When that happens, protect the area, record the impact, obtain authorized direction, update the work record, and notify every affected crew. Do not leave a critical change in a text message or verbal conversation that the following shift cannot find.
Inspect work against observable criteria
Use the relevant documents to check stationing, elevations, cross-slope, layer records, material tickets, joints, inlets, tie-ins, and acceptance tests. Confirm the measurement point, unit, test method, acceptance limit, and responsible reviewer before work begins. Tie each observation to a location, date, drawing revision, and material lot where applicable. A visual review is useful, but it cannot replace a specified test or approval. List each open item with an owner and a due date.
Inspect interfaces as carefully as the central surface or component. Edges, transitions, drains, covers, joints, access points, and adjacent materials often reveal whether the assembly is working as intended. Photograph defects with enough context to relocate them. If a result will soon be covered, pause and complete the required review first; otherwise, the team may lose the evidence needed to accept or correct the work.
Diagnose issues before choosing a repair
When a problem appears, describe its location, shape, extent, date, weather, traffic, and nearby construction activity. For the road corridor, pavement section, shoulder, curb, drainage, utilities, and tie-ins, investigate symptoms such as settlement, cracking, rutting, ponding, raveling, edge breakup, and defects near trenches or structures. Check whether the issue follows a joint, trench, edge, water path, material change, or work boundary. A symptom can have more than one cause, so avoid treating the visible mark as a complete diagnosis.
Compare the condition with survey data, inspection notes, service logs, and earlier repairs. Determine whether the issue is limited to a surface layer or may involve support, drainage, material compatibility, operation, or an unrecorded change. Use qualified engineering, geotechnical, materials, legal, or safety support where the decision requires it. Record the cause considered and why the repair selected matches that cause.
Coordinate people, access, and safety
Include work-zone setup, pedestrian access, equipment movement, deliveries, emergency access, and changing traffic in the work plan. Identify who controls the area, how others are kept out of moving equipment or restricted routes, and how a person reports an unsafe change. Use the approved site, traffic, or employer safety plan and confirm that assigned personnel have the required training. A sign, barrier, or item of protective equipment does not replace the complete plan.
Give affected people clear information about timing, alternate access, restricted areas, and the contact for questions. Check the route from the user’s point of view, not only from the crew’s setup position. Reinspect after a shift change, equipment move, weather event, or new work phase. If the approved controls no longer fit, pause the affected task and get direction before continuing.
Manage cost, timing, and lifecycle effects
The result can depend on traffic loading, water, weather, construction quality, drainage upkeep, and maintenance windows. Record quantities, expected duration, inspection needs, access restrictions, material lead times, and maintenance responsibilities before making a budget or schedule commitment. For cost questions, compare current local proposals against the same written scope; broad online averages are not a reliable price for a particular site. For status or employment questions, confirm changing information with the responsible current source.
Plan for the work after installation or service, not only the initial activity. Identify routine inspections, cleaning, repair, seasonal preparation, and the party responsible for them. A lower initial cost can carry more maintenance or disruption, while a premium option may exceed the actual need. State the assumptions behind any lifecycle comparison and revisit them if use, traffic, climate, or ownership changes.
Prepare a useful handover record
Keep approved drawings, test reports, survey, delivery tickets, traffic stages, changes, as-builts, and open items together with the final work package. Make the record searchable by location and date, and label the revision, responsible person, and open item. Include approved changes and explain any temporary limitation. A folder of unlabelled photographs or duplicate drawings is difficult to use when a future crew needs to find a buried feature, verify a surface, answer a resident, or check an invoice.
At closeout, walk the work with the responsible party, confirm access and maintenance instructions, and assign unresolved items. Record the actual condition rather than copying the original plan as if nothing changed. Future repairs should use these records to understand the assembly and avoid incompatible work. A clear handover is part of the project result, not an administrative task to leave until after the crew has departed.
Frequently asked questions
What should be checked first for ctb in road construction?
Start with the current project documents, exact location, existing conditions, intended use, and responsible decision-maker. Confirm unresolved measurements, access, utilities, drainage, approvals, or service triggers before work or a public update proceeds.
What should happen if the field condition differs from the plan?
Document the location and condition, protect the affected area, notify the authorized professional, and obtain written direction before changing the work.
Related posts in Driveways, Roads & Paving
Continue with A Construction Crew is Lengthening a Road, and Base Course in Road Construction, and Box Cutting in Road Construction for connected guidance within the same category.




Leave a Reply
Want to join the discussion?Feel free to contribute!