
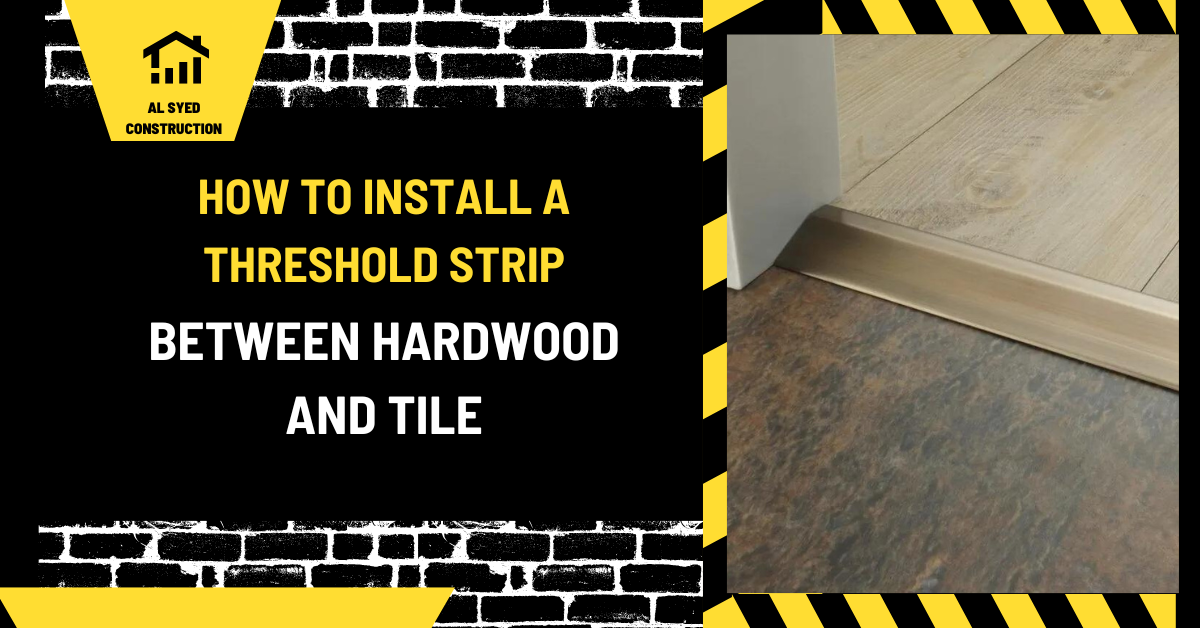
Install Threshold Strip Between Hardwood and Tile
install threshold strip between hardwood and tile describes a dimension, component, or condition associated with a door or window opening. Read it against the wall type, installed frame, finished floor, and wall surfaces. Support, dimensions, and water-management details must be coordinated; a label alone is not a complete project detail.
1. Gather Required Tools and Materials
Before beginning, assemble the necessary tools and materials. Having everything on hand will streamline the process and help achieve a professional finish.
- Threshold strip (matching the height and style for your floors)
- Measuring tape
- Utility knife
- Screwdriver or drill
- Level
- Pencil
- Adhesive (if needed)
- Screws or nails
- Wood filler (for hardwood)
- Tile grout (for tile adjustments)
2. Measure and Cut the Threshold Strip
Measure the width of the doorway where the threshold strip will be installed. Use a measuring tape to determine the exact length of the strip needed. Mark the measurements on the threshold strip and use a utility knife or saw to cut it to size. Ensure the cut is straight and clean for a precise fit.
3. Prepare the Flooring
Before installing the threshold strip, make sure the area where it will be placed is clean and dry. Remove any debris or old adhesive from the area. For hardwood, fill any gaps or holes with wood filler and allow it to dry completely. For tile, ensure the grout lines are smooth and level.
4. Dry Fit the Threshold Strip
Place the threshold strip in the doorway to check the fit. Use a level to ensure it sits evenly between the hardwood and tile floors. Adjust the cut if necessary to achieve a perfect fit. This dry fitting step helps to avoid any mistakes during the final installation.
5. Install the Threshold Strip
Depending on the type of threshold strip you have, follow these steps:
- For Adhesive Installation: Apply adhesive to the underside of the threshold strip. Press it firmly into place, ensuring it aligns properly with the edges of the hardwood and tile. Hold it down for a few minutes to allow the adhesive to set. Clean any excess adhesive with a damp cloth.
- For Screws or Nails: Position the threshold strip over the joint between the hardwood and tile. Secure it with screws or nails, drilling into the subfloor if necessary. Ensure the screws or nails are flush with the surface of the strip to avoid any tripping hazards.
6. Adjust and Seal the Edges
Once the threshold strip is secured, check for any gaps between the strip and the flooring. Fill small gaps with tile grout or wood filler as needed. Smooth out the filler with a putty knife and allow it to dry completely. For a seamless look, apply a bead of caulk or sealant along the edges where the threshold strip meets the flooring. This step helps to prevent moisture from seeping underneath and provides a finished appearance.
7. Final Inspection and Clean-Up
After installation, inspect the threshold strip to ensure it is securely fastened and level. Test the transition between the hardwood and tile to ensure there are no uneven spots or gaps. Clean up any excess adhesive or filler from the surrounding area. Sweep or vacuum the floor to remove any debris created during the installation process.
8. Maintenance Tips
Regular maintenance of the threshold strip will keep it in good condition. Clean the strip with a gentle cleaner suitable for the material of the strip. Inspect it periodically for signs of wear or damage, and address any issues promptly to maintain a smooth and safe transition between flooring types.
Conclusion
Installing a threshold strip between hardwood and tile is a crucial step in achieving a seamless transition between different flooring types. By following these detailed instructions, you can ensure a precise and professional installation that enhances both the functionality and appearance of your floors.
Install Threshold Strip Between Hardwood and Tile: Meaning in Context
The project context determines whether install threshold strip between hardwood and tile names a component, an arrangement, a finish, or a field condition. Nearby terms may describe related parts without meaning the same thing. In technical use, locate the term in the relevant detail and note the component it modifies. That prevents a familiar word from being treated as a complete specification. Record the location and intended function when discussing it with the design or installation team.
For this topic, separate the named element from the full door or window opening. The assembly may include the structural wall, rough opening, frame, jambs, head, sill or threshold, and finishes. Those neighboring pieces influence fit and performance, while the term itself describes only one part of the decision. If a note is ambiguous, compare the schedule, section, and product information before ordering or changing work. For threshold strip hardwood context install, compare approved product information with measured site conditions.
How the door or window opening works
Review install threshold strip between hardwood and tile as part of the way the door or window opening connects to adjoining construction. The relevant interfaces include reference dimensions, support, flashing, floor elevation, wall thickness, and trim. A component can look correct on its own and still conflict with another layer, finish, or moving part. The detail should make clear which materials meet, which item supports another, and where movement or drainage is expected.
These relationships also affect the sequence of work. Framing, finishes, hardware, glazing, and sealants may be installed by different trades. Confirm who provides each transition and when it can be inspected. Where the drawings show a concealed connection, photograph or record it before covering it if the project requires that evidence. Before closing the assembly, document the threshold strip hardwood context install transition shown in the project set.
Reading Plans, Schedules, and Details
Begin with the plan to locate the opening or component, then compare the elevation, section, enlarged detail, schedule, and written specification. Check that each document uses consistent terminology and dimensions. A schedule may identify a type while the detail defines its connection; neither should be read without the other. Product submittals need to correspond to the exact location and configuration being reviewed. The handoff for threshold strip hardwood context install should preserve the final approved configuration.
For existing work, compare the record drawings with field conditions instead of assuming they are exact. Measure the relevant surfaces, note wall or floor layers, and record any visible movement or previous repair. If a dimension or description conflicts, request a documented clarification before fabrication or installation. This step is especially important when the work affects structure, weather control, fire protection, or a required clear path. For threshold strip hardwood context install, verify the component and location against the latest project detail.
Selection and Coordination
Choose a product or detail around the documented use of the space, expected exposure, appearance, maintenance access, and performance criteria. For install threshold strip between hardwood and tile, ask what the completed assembly must do and which adjacent components enable that result. Similar-looking products may differ in operation, material compatibility, or approved use, so compare the actual submittal with the project requirements rather than relying on a broad product label.
Coordinate dimensions and interfaces before purchase. Check accurate fit, load support, drainage, air and water control, and finish alignment along with available clearances and the planned finish layers. Samples or a mockup can help resolve appearance and workmanship where words are not precise enough. Document accepted substitutions and carry them into the current schedule or detail so that the installer and future maintenance team can identify what was approved. At the threshold strip hardwood context install location, record field variations before adjacent work is completed.
Installation Sequence and Field Checks
Use the approved installation instructions for the actual substrate and system. Before work begins, confirm the site condition, reference dimensions, required support, and materials that will be concealed. Keep the sequence consistent with the detail so that flashing, seals, fasteners, or retainers remain continuous. A generic installation habit should not replace a product-specific instruction or a project requirement. Use the threshold strip hardwood context install detail to confirm which trade owns the connection and review.
During the work, check measurement points, diagonals, wall thickness, substrate, frame fit, and concealed transitions. Verify alignment and fit before adding trim or closing the surrounding construction. If a part must be forced into place, if a gap changes across the opening, or if a connection does not match the approved drawing, stop and resolve the discrepancy. Record the correction and confirm that it does not obstruct drainage, movement, access, or future service. For threshold strip hardwood context install, compare approved product information with measured site conditions.
Performance and Diagnosis
Common concerns for this assembly include frames that do not fit, lost clearances, gaps, blocked drainage, and inconsistent dimensions. These symptoms can have different causes, so locate where the condition begins and whether it changes with use, weather, or adjacent work. Check the component and its interfaces, not just the visible surface. Water marks, for example, may originate above or beside the point where they appear. A field note for threshold strip hardwood context install should identify the interface, not just a visible symptom.
Use inspection or testing methods specified for the project when visual review alone cannot establish performance. A cosmetic repair may hide a gap without correcting support, alignment, or a failed transition. If the condition may affect safety, structure, fire protection, or weather resistance, obtain qualified review before modifying the assembly. Keep a brief record of the observed condition and the action taken. Before closing the assembly, document the threshold strip hardwood context install transition shown in the project set.
Maintenance and Handoff
Plan maintenance around the materials and moving parts that were actually installed. For install threshold strip between hardwood and tile, periodic checks should include record as-built dimensions, watch for movement or moisture, and retain approved details. Follow the supplier’s guidance for cleaning and adjustment, and avoid incompatible products that can damage coatings, finishes, seals, or hardware. A small service record helps separate normal wear from a recurring installation or moisture problem.
At turnover, retain the approved product data, shop drawings, finish selections, and any accepted field changes. Label or photograph concealed components where useful. When repairs are needed later, use those records to identify the correct replacement and compatible materials. If the source of a defect is unclear, inspect the adjoining layers before repeating a patch that did not last. For threshold strip hardwood context install, verify the component and location against the latest project detail.
Common questions
What does install threshold strip between hardwood and tile refer to?
Confirm whether the measurement is to framing, masonry, a frame, or the finished clear opening before comparing dimensions.
Why can rough and finished dimensions differ?
Frames, jambs, trim, flooring, and other finish layers occupy space. The detail should show which surfaces define each dimension.
Does an opening size determine a header?
No. Support depends on the wall, loads, and structural design. Follow approved documents before changing a structural opening.
What should be measured in an existing building?
Record width and height at multiple points, wall thickness, floor level, squareness, substrate, and signs of movement or moisture.
When should a discrepancy pause work?
Pause affected fabrication or installation when field measurements conflict with the approved schedule or structural detail.
Related reading
For nearby components and coordination details, see Install Threshold Strip Between Vinyl and Tile; Threshold in Construction: Meaning and Use; Jam and Jamb in Construction: Meaning and Use.
Conclusion
Install threshold strip between hardwood and tile should be reviewed as part of a coordinated building assembly. Use the project documents, approved product information, verified field conditions, and qualified review to confirm fit and intended performance before work is concealed.

Leave a Reply
Want to join the discussion?Feel free to contribute!