
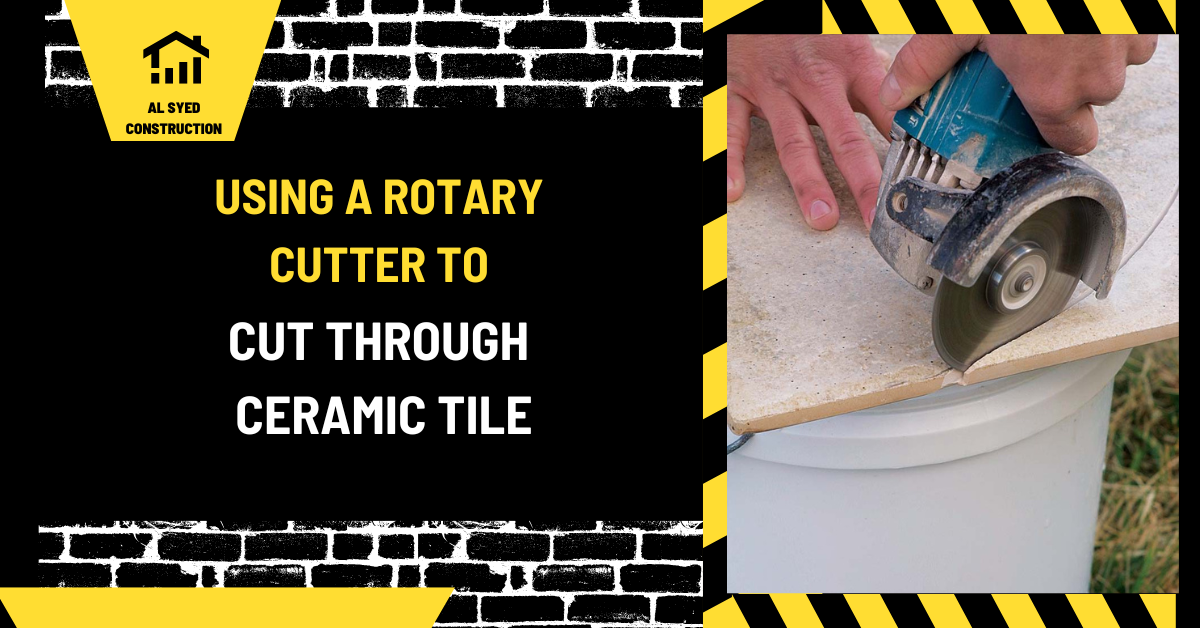
Using a Rotary Tool to Cut Ceramic Tile
A rotary tool fitted with a bit or wheel rated for ceramic tile can make small, detailed cuts, notches, and openings that are difficult to reach with a manual cutter. It is most useful for trimming a limited amount of material around an outlet, pipe, or irregular edge. For long straight cuts or large quantities, a score-and-snap cutter or wet saw is often more suitable. The right tool depends on the tile material, cut shape, finish quality, and the manufacturer’s instructions.
“Rotary cutter” can mean different tools. In tile work, people often mean a handheld rotary tool with a diamond wheel, carbide bit, or tile-specific accessory. A handheld rotary tool is not the same as a wet tile saw and may not be safe or efficient for every ceramic tile. Confirm that the accessory is designed for the material and the tool’s speed range.
When a rotary tool makes sense
A rotary tool can help create small arcs, narrow notches, rounded corners, or relief cuts. It offers control in tight spaces and can refine an edge after a larger cut. It may be useful for a small repair or a few tiles, especially when access prevents a larger saw from reaching the cut line.
It is less effective for cutting many full tiles or long straight edges. A handheld tool can wander, overheat, chip glaze, or produce an uneven line. A wet saw has a stable table and guide for repeated straight cuts, while a manual score cutter can be faster for suitable ceramic tiles. Compare the desired edge quality and the tile thickness before choosing.
Some tiles are harder or more brittle than others. Porcelain, glass, stone, and large-format products may require different blades, cooling, or fabrication equipment. Check the exact tile’s cutting guidance. A decorative edge visible in the finished room may be better handled by a professional fabricator.
Choose the correct accessory
Use a diamond wheel or bit rated for ceramic tile and compatible with the rotary tool. Accessory shape affects the cut: a wheel is suited to a slit or edge cut, while a small grinding bit can enlarge or shape an opening. Confirm the accessory’s maximum speed and the tool’s collet size. A worn or incorrect bit can overheat and damage the tile.
Do not use a general-purpose wood or metal accessory just because it fits the tool. The tile’s glaze and body can be abrasive. Use only manufacturer-approved accessories and inspect them for cracks, missing segments, or wear before starting. Secure the tile on a stable surface so it cannot vibrate or move.
Some rotary tools support wet attachments, while others are intended for dry use only. Do not introduce water to an electrical tool unless the manufacturer expressly allows that setup and the work area is designed for it. Dust extraction or wet cutting has to be selected based on the tool, material, and safety plan.
Plan and mark the cut
Measure the opening twice and mark the cut on the tile’s finished face. Use a template for curved or irregular shapes. Keep the cut line away from a fragile edge where possible and avoid creating a sharp inside corner that concentrates stress. For an opening around a pipe, allow the required clearance and plan a trim ring or escutcheon to cover the edge.
Dry-fit the tile in position and mark the actual location, accounting for grout joints and substrate alignment. A cut measured from the room wall can be wrong if the wall is out of square. Mark the waste side clearly. For a visible cut, consider whether a factory edge, profile, or different layout would produce a cleaner finish.
Use a straightedge or guide if the tool permits it. For curved cuts, make several shallow relief cuts rather than forcing the wheel through a tight curve. Keep the cut within the waste area and finish gradually. A small chip may be visible after grouting, so protect the glaze with careful handling.
Prepare a safe work area
Ceramic tile cutting can create sharp fragments and fine dust. Some silica-containing materials produce respirable crystalline silica when cut or ground. Work outdoors or in a controlled area when possible, use suitable dust extraction or wet methods if the equipment permits, and follow applicable safety requirements. Wear eye protection, hearing protection, gloves appropriate for handling tile, and respiratory protection selected for the task.
Secure the tile with clamps or a stable support, keeping hands away from the wheel. Use a tool with an appropriate guard and do not remove the guard to access a difficult angle. Check the power cord, battery, accessory, and work surface. Keep bystanders away and do not cut near combustible material or standing water when using an electrical tool.
Do not dry sweep fine dust or use compressed air to clean it. Use a suitable vacuum or cleanup method for the material and work area. If an older tile or adhesive could contain asbestos, stop before cutting and arrange professional assessment.
Cutting with a rotary tool
Put on protective equipment and run the tool at the speed recommended for the accessory. Start outside the visible edge if possible and make a shallow scoring pass to establish the line. Let the tool do the work; pushing hard increases heat and can chip or break the tile. Keep the tool moving at a controlled pace and pause if the accessory overheats.
For a notch, cut short relief lines into the waste, then remove small sections. For a hole, use an appropriate tile bit and work from the marked center, supporting the tile from below. Do not twist or lever the accessory. For a straight edge, guide the tool carefully and accept that a handheld rotary tool may not create a perfectly straight finish.
Stop before the cut reaches the final edge if the tile is fragile, then finish the last portion from the other side when practical. Smooth the cut with a tile-rated abrasive or stone, keeping the edge supported. Do not grind more material than needed because heat and vibration can cause cracks.
Finish and dry-fit the tile
After cutting, inspect the tile for cracks, chips, or a rough edge. Smooth sharp areas with an appropriate abrasive and clean away dust. Dry-fit the piece in its opening and check the clearance, reveal, and alignment with neighboring joints. A tight fit can bind against a pipe or wall and cause cracking when materials move.
Use a trim profile, escutcheon, or sealant where the design requires an exposed edge or flexible joint. The tile edge should be supported by the setting system. Do not use grout to fill a movement gap around a pipe or at a change of plane where sealant is specified.
If the cut is visible and uneven, recut or replace the tile rather than relying on a thick bead of caulk. A well-planned layout can place factory edges at prominent locations and reduce complicated cuts.
Rotary tool versus other tile cutters
A manual score-and-snap cutter is efficient for straight cuts in compatible ceramic tile. A wet saw can handle longer cuts, thicker tile, and some angled cuts with a guided table. Tile nippers can remove small bites from edges, while hole saws can create circular openings. Each tool has limits and requires the correct blade or bit.
For repeated production, stable equipment usually improves speed and consistency. A rotary tool is best viewed as a detail tool, not a universal replacement for a tile saw. A rental wet saw or professional cutting service may be more economical than damaging several expensive tiles. Compare setup time, dust, water handling, and edge quality.
Some materials require specialized fabrication. Glass can chip, stone can fracture along veins, and dense porcelain can wear accessories quickly. Follow the product’s technical information and tool guidance. If the material is costly or the cut is critical, practice on an offcut or hire a fabricator.
Common mistakes
Common mistakes include using the wrong accessory, pressing too hard, cutting without securing the tile, ignoring dust, and measuring from an irregular wall. Other errors include making a sharp inside corner, cutting too close to an edge, and failing to test the fit before setting mortar. These problems can waste tile and create weak edges.
Do not cut over finished flooring without a protective surface. Do not use a tool without its guard or run it outside its rated speed. Do not assume a wet method is safe with an unapproved electrical tool. Plan the setup and follow the equipment instructions.
Frequently asked questions
Can a rotary tool cut ceramic tile?
Yes, with a tile-rated accessory for small detail cuts, but it may not be ideal for long straight cuts or thick, hard tile.
Will a rotary tool cut porcelain tile?
Some accessories can cut porcelain, but material hardness and accessory ratings matter. Check the tool guidance and practice on scrap.
Is a rotary tool better than a wet saw?
It is better for some small, detailed shapes; a wet saw is generally more controlled for long straight cuts and repeated work.
How do I reduce dust?
Use a suitable extraction or approved wet method, follow safety rules, wear appropriate protection, and clean with a method that captures fine dust.
Estimate material needs before cutting with a tile calculator, then add extra pieces for test cuts and breakage.





Leave a Reply
Want to join the discussion?Feel free to contribute!