
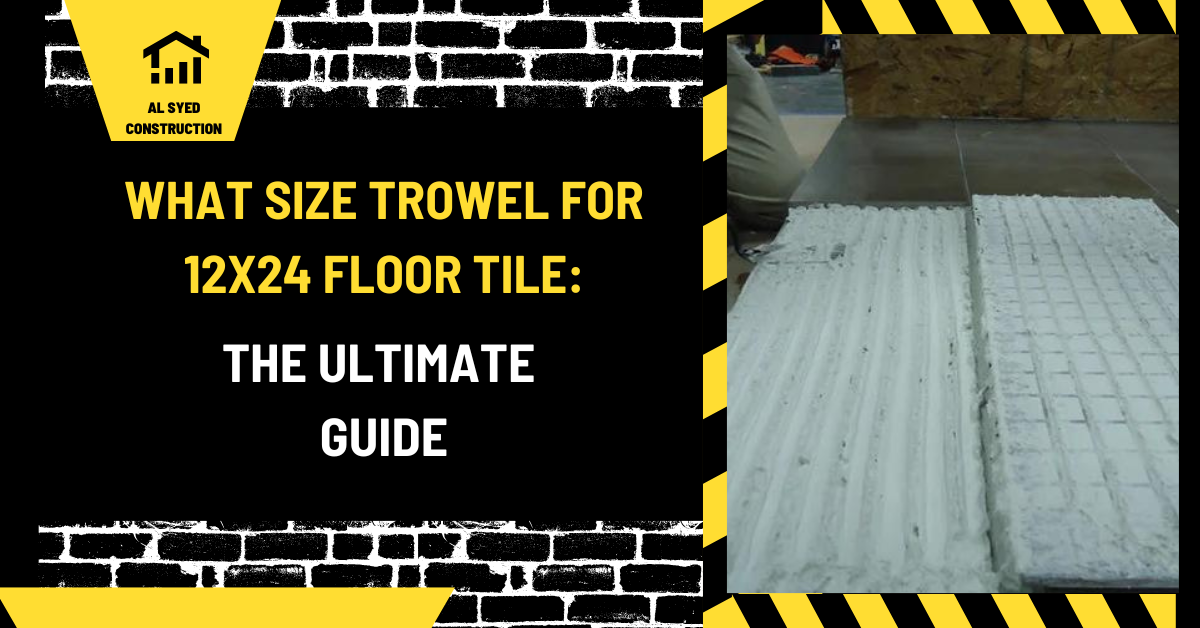
Trowel Size for 12×24 Floor Tile: A Practical Guide
Quick Answer: What Trowel for 12-by-24 Floor Tile?
There is no single notch that fits every 12-by-24-inch tile. Installers commonly test a large-format-tile trowel such as a 1/2-by-1/2-inch square notch or a 1/4-by-3/8-inch slant notch, then confirm that the chosen mortar achieves the required contact and support. The right option depends on the tile’s back pattern, flatness, substrate plane, mortar, and installation location. Follow the mortar maker’s instructions and lift a tile during the test to inspect the transfer before setting the full floor.
Large-format tile makes small variations easier to see and harder to correct. A trowel that leaves too little mortar can create hollow areas or weak support; a notch that is too large can cause excessive squeeze-up and make it difficult to keep tiles aligned. The goal is not simply to lay down more mortar. It is to collapse the ridges into a consistent bed that supports the tile without leaving voids.
Why Trowel Size Matters
A notched trowel meters mortar onto the floor in ridges. Its notch width, depth, and shape influence how much material is placed, but the final mortar bed also depends on the angle at which the trowel is held and how firmly the tile is moved into the ridges. A large tile needs enough mortar to make contact across its back and support its edges and corners, but excessive material can push the tile out of plane.
Good coverage improves bond and helps distribute normal service loads through the tile assembly. Poor coverage can leave unsupported areas where corners are more vulnerable to impact. Uneven ridges can also contribute to lippage, the height difference between the edges of neighboring tiles. Trowel selection is one part of a system that includes substrate preparation, mortar choice, layout, movement joints, and careful setting.
Common Trowel Options for 12-by-24 Tile
| Trowel profile | When installers may test it | What to verify |
|---|---|---|
| 1/2-by-1/2-inch square notch | Tile backs with deeper relief, less-flat tile, or a bed that needs more mortar volume | Ridges collapse without excessive squeeze-up; tile remains at the planned height |
| 1/4-by-3/8-inch slant notch | Some flatter tile and substrates where the system instructions allow a lower mortar profile | Full, even transfer to the tile back and adequate edge and corner support |
| Euro or specialty notch | When a specific mortar manufacturer recommends that profile for its product | Follow the product’s trowel chart and verify coverage in a test area |
These are starting points for a field test, not a guarantee. Two tiles with the same face dimensions may have different back ribs, warpage, thickness, or material. A porcelain tile with pronounced lugs can need a different approach from a flatter ceramic tile. Always use the current instructions for the selected mortar and tile rather than relying on a chart detached from the product system.
Check Tile Flatness and the Floor First
Before spreading mortar, check the substrate with a straightedge and compare it with the flatness tolerance required for the tile size and pattern. Large-format tiles bridge over small high and low spots; trying to correct a badly uneven floor by applying extra setting mortar can lead to inconsistent thickness, lippage, and a weaker installation. Correct the floor with an appropriate patching or leveling method before setting tile, and allow it to cure as directed.
Inspect several tiles from different boxes. Place them face-to-face or back-to-back to observe bowing, and check whether the edges are square. The tile manufacturer’s tolerances and installation recommendations matter because the permissible grout-joint width and pattern can affect the appearance of lippage. A staggered pattern can align the high center of one tile with the low end of another; a more balanced offset may reduce the visual effect of natural tile warpage.
Choose the Mortar Before the Notch
Use a mortar approved for the tile material, size, substrate, and location. Large-and-heavy-tile mortars are formulated to support heavier pieces and help reduce slump, but the exact product instructions still control. If the tile is porcelain, natural stone, installed over a membrane, or used in a wet area, check compatibility with every layer beneath it. A mortar label that says “large format” does not replace the project specification or waterproofing details.
Read the bag for water ratio, mixing sequence, slake time if required, pot life, open time, and temperature range. Mix only an amount you can place within the working period. Never add water to mortar that has begun to stiffen in the bucket unless the manufacturer explicitly permits a specific procedure. For more on mortar types and how they differ from ready-to-use adhesives, see our guide to thin-set mortar in construction.
How to Trowel and Set the Tile
- Establish the layout. Dry-lay a few rows, confirm the starting line and cuts, and plan movement joints where required. Check the tile manufacturer’s recommendations for pattern and offset.
- Key in the mortar. Use the flat side of the trowel to press a thin coat of mortar into the prepared substrate. This helps wet the surface and establish contact.
- Comb uniform ridges. Hold the notched trowel at a consistent angle and comb in straight, parallel lines. Avoid arcs and swirling because curved ridges can trap air and resist collapse.
- Back-butter when appropriate. Spread a thin coat on the tile back if the system instructions or coverage test call for it. Back-buttering adds contact; it is not a way to compensate for an unflat floor or an unsuitable mortar.
- Set and move the tile. Place the tile into fresh ridges and move it perpendicular to the ridge direction enough to collapse the lines. Use a controlled motion rather than only pressing straight down.
- Check the transfer. Lift a tile early in the work and inspect the mortar on both surfaces. Adjust notch, angle, coverage method, or substrate preparation until the bed is consistent and the required coverage is achieved.
- Keep joints and plane consistent. Use spacers or leveling clips as appropriate, but do not rely on clips to force a bowed tile flat. Remove mortar from joints before it hardens.
For many interior floor applications, industry installation guidance commonly calls for at least 80 percent mortar contact; wet and exterior installations generally require higher coverage, commonly 95 percent, with full support at edges and corners. Confirm the applicable standard, project specification, and mortar manufacturer’s instructions for your installation. The coverage target is measured by inspecting a lifted tile, not by judging how much mortar was spread.
How to Read a Coverage Test
After placing a test tile, lift it straight up and examine the back. Look for ridges that have been flattened into a connected bed, not isolated stripes. Pay special attention to corners and edges, which need support. If the ridges remain sharply defined, change the setting motion, use a different notch, or revisit whether the substrate is flat. If too much mortar squeezes into the joints or the tile sinks below the desired plane, the notch or trowel angle may be too large for the conditions.
Repeat the test after changing the mortar, trowel, tile batch, or substrate condition. Mortar coverage can vary from one room to another because a slab may be smoother in one area and rougher in another. A single test at the start is useful, but periodic checks help catch changes while they can still be corrected.
Common Trowel Mistakes to Avoid
- Choosing by tile dimensions alone: The back pattern, substrate, and mortar matter as much as the face size.
- Using a trowel to level the floor: Setting mortar is not a substitute for correcting significant substrate variation.
- Combining ridges in different directions: Crossed or curved lines can make air release and ridge collapse less predictable.
- Spreading too far ahead: Mortar may skin over before tile is placed, weakening transfer. Work within the stated open time.
- Skipping lifted-tile checks: A tile can look level from above while having poor contact underneath.
- Ignoring joints or movement: Grout joints and movement joints serve different purposes. Follow the installation plan rather than filling every gap with mortar.
Frequently Asked Questions
Is a half-inch square-notch trowel always best for 12-by-24 tile?
No. It is a common starting point, but the right notch depends on the tile back, substrate, mortar, and required bed thickness. Confirm the product recommendation and test coverage by lifting a tile.
Can I use a quarter-by-three-eighths-inch trowel?
It may work for some tile and substrate combinations when the mortar maker permits it and the coverage test meets the installation requirements. If coverage is insufficient, change the method or notch instead of accepting voids.
Should I back-butter every 12-by-24 tile?
Back-buttering may help achieve the required contact, especially with textured backs or large tiles, but it does not replace flatness, correct troweling, or a coverage check. Follow the system instructions.
How do I estimate the number of tiles for the floor?
Measure the finished area, account for closets and fixed obstacles, then add a practical allowance for cuts, pattern, and breakage. Our tile calculator can help organize a quantity estimate; confirm the final order with the installer and tile supplier.
Can a larger notch fix a floor that is not flat?
No. A larger notch can leave a thicker bed, but it does not make an uneven substrate acceptable. Flatten the floor with a suitable preparation product before tile installation.
Bottom Line
For 12-by-24 floor tile, start with the tile and mortar manufacturers’ instructions, then verify the chosen notch in a test area. A 1/2-by-1/2-inch square notch and a 1/4-by-3/8-inch slant notch are common options to evaluate, not universal rules. Prepare the floor, comb straight ridges, move the tile to collapse them, and lift a tile to confirm support at the edges and corners. This measured approach is more reliable than selecting a trowel by tile size alone. For the full installation sequence, see our guide to laying floor tiles.







Leave a Reply
Want to join the discussion?Feel free to contribute!