
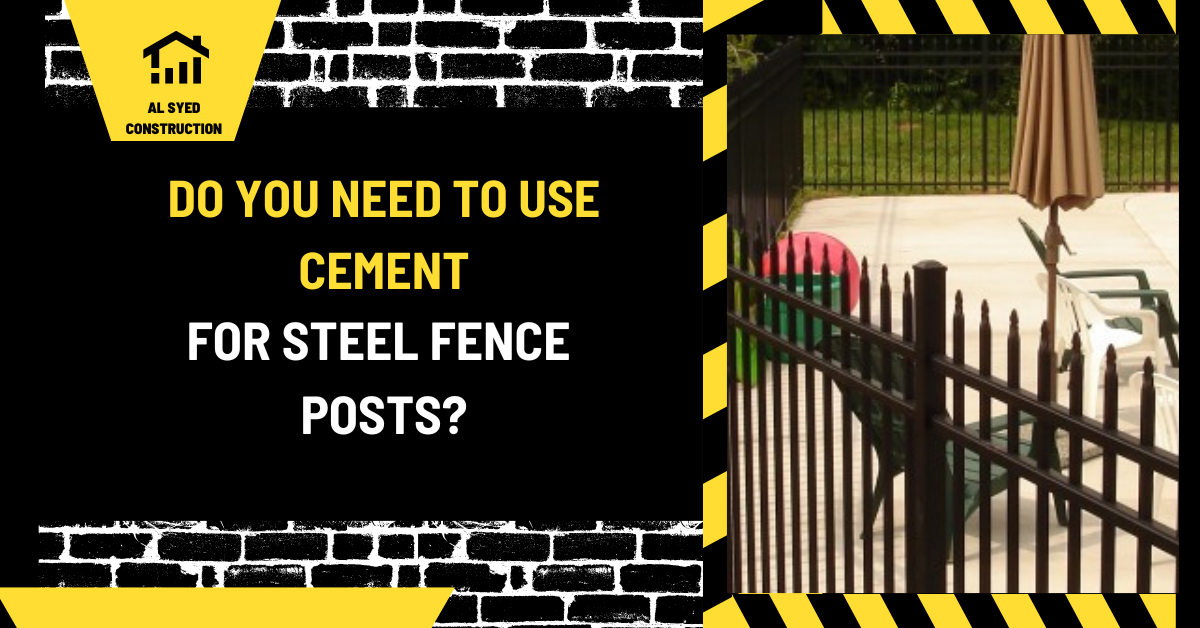
Steel Fence Posts: Should You Use Concrete?
In brief. Whether a steel fence post needs concrete depends on the fence system, post loads, soil, frost and drainage conditions, and manufacturer or engineered details. A concrete collar is not automatically the right answer for every site.
When installing steel fence posts, a common question arises: “Do you need to use cement?” This comprehensive guide explores the necessity of cement in securing steel fence posts, detailing various methods, benefits, and best practices to ensure a stable and long-lasting installation.
Understanding the Role of Cement in Fence Post Installation
Cement plays a crucial role in traditional fence post installations. It creates a solid foundation by anchoring posts securely in the ground, providing resistance against movement and external forces. However, when it comes to steel fence posts, the need for cement can vary based on several factors.
1. Benefits of Using Cement for Steel Fence Posts
a. Enhanced Stability
Using cement to set steel fence posts provides exceptional stability. Cement forms a solid, immovable base that supports the post and prevents shifting or wobbling. This is particularly important in areas with loose or sandy soil, where posts might otherwise become unstable.
b. Increased Longevity
A cemented base helps protect the steel post from environmental factors that can cause deterioration. Cement provides a barrier against moisture, reducing the risk of rust and corrosion. This is crucial for extending the life of the steel posts, especially in areas with high rainfall or snow.
c. Uniform Support
Cement ensures uniform support around the entire circumference of the post, distributing weight evenly. This prevents localized stress points that could lead to structural failure over time.
2. Alternatives to Cement for Steel Fence Posts
While cement is a traditional and effective method for setting steel fence posts, there are alternative approaches that might suit different scenarios or preferences.
a. Gravel or Pea Shingle
Gravel or pea shingle can be used as a base for steel fence posts. This method involves placing a layer of gravel at the bottom of the post hole, then setting the post and adding more gravel around it.
- Advantages: Gravel allows for water drainage, reducing the risk of water pooling and rust. It also provides flexibility in adjusting the post’s position before the gravel settles.
- Limitations: This method may not offer the same level of stability as cement, particularly in loose or unstable soil conditions.
b. Concrete Mixes
Pre-mixed concrete or quick-setting concrete can be alternatives to traditional cement. These products are designed to be easy to use and offer the same stability benefits as cement.
- Advantages: Quick-setting concrete can be ideal for projects requiring faster installation. It still provides the durability and support of cement.
- Limitations: These mixes may be more expensive and require precise mixing and application techniques.
c. Metal Post Anchors
Metal post anchors are designed to be driven into the ground, providing a sturdy base for steel posts without the need for cement.
- Advantages: Metal anchors are quick to install and eliminate the need for mixing and setting cement. They are also effective in providing stability in various soil conditions.
- Limitations: They may not be suitable for all soil types and might not offer the same level of long-term protection against rust as cement.
Best Practices for Cementing Steel Fence Posts
If you decide to use cement for your steel fence posts, following best practices will ensure a successful and durable installation.
1. Prepare the Post Hole
- Depth and Diameter: Dig a post hole that is at least one-third the length of the post and twice the diameter of the post. This provides ample space for the cement to support the post securely.
- Soil Condition: Ensure the bottom of the hole is level and free from loose soil or debris.
2. Position the Post
- Leveling: Place the steel post in the center of the hole, using a level to ensure it is perfectly vertical. Adjust the post as needed before proceeding.
- Temporary Support: Use braces or supports to hold the post in place while the cement sets.
3. Mix and Pour Cement
- Mixing: Prepare the cement mix according to the manufacturer’s instructions. The mix should be thick enough to hold the post securely but not too dry.
- Pouring: Fill the hole with the cement mix, ensuring it surrounds the post evenly. Tap the sides of the hole gently to remove air bubbles and ensure the cement settles properly.
4. Curing and Finishing
- Curing Time: Allow the cement to cure for at least 24 to 48 hours before removing any supports or applying additional weight to the post.
- Finishing: Smooth the surface of the cement and ensure proper drainage away from the post to prevent water accumulation.
Common Issues and Solutions
1. Post Shifting or Leaning
- Problem: If the post shifts or leans after setting, it may be due to inadequate mixing or curing.
- Solution: Recheck the post’s alignment and, if necessary, add additional cement around the post and allow it to cure fully.
2. Cracking in Cement
- Problem: Cracks in the cement may occur due to rapid drying or improper mixing.
- Solution: Ensure proper curing by keeping the cement moist and avoid exposing it to extreme temperatures. Use a concrete sealant if needed.
3. Rust on Steel Posts
- Problem: Rust may develop if the steel post is not adequately protected.
- Solution: Consider applying a rust-resistant primer or paint before setting the post in cement. Ensure the cement mix creates a proper seal to protect the post.
| Review point | What to verify |
|---|---|
| Layout | Verify boundary, utilities, slope, and gate openings. |
| System | Coordinate posts, rails, panels, and fasteners. |
| Closeout | Check latches, transitions, finish, and drainage. |
Posts, infill, and gates should be specified as one fence system; use fence post depth calculator and fence post spacing calculator to coordinate the adjacent choices.
Turn the fence concept into a buildable layout
Whether a steel fence post needs concrete depends on the fence system, post loads, soil, frost and drainage conditions, and manufacturer or engineered details. A concrete collar is not automatically the right answer for every site. Use the topic as a decision to verify on the actual site, not as a universal detail copied from an unrelated project.
Check soil behavior, water exposure, fence height and wind exposure, post coating, embedment detail, and the gate or panel loads carried by the post. Write the assumption beside the measurement or drawing that supports it. This makes it easier for an owner, designer, installer, and inspector to see what has been decided and what still needs confirmation.
For fence work, start with the surveyed line and walk the proposed route. Soil, slope, wind exposure, vegetation, utilities, gate openings, and neighboring conditions can change post locations and panel choices. A fence that looks continuous on a plan may need stepped or raked sections in the field, and each transition should maintain the intended privacy, containment, or safety function.
Turn the plan into field checks
Start by recording the existing condition and the intended result. Compare the proposed work with the adjacent surface, support, opening, boundary, or drainage path. Confirm that the selected product and connection belong to the same system, then identify which work must be inspected before it is covered. These checks prevent a good-looking finish from hiding a weak interface or an unresolved water path.
| Review point | What to verify |
|---|---|
| Layout | Verify boundary, utilities, slope, and gate openings. |
| System | Coordinate posts, rails, panels, and fasteners. |
| Closeout | Check latches, transitions, finish, and drainage. |
Sequence the work around hold points
- Confirm the site measurements, existing material, and intended use before ordering or demolition.
- Resolve the structural, drainage, access, boundary, or code question that controls the layout.
- Check product instructions and approved drawings before cutting, fastening, placing concrete, or closing an enclosure.
- Inspect connections, edges, transitions, and water movement while each item remains visible.
- Record the final product, changes, approvals, and maintenance requirements for the next owner or contractor.
Failure pattern to prevent
Pouring concrete around a post without a drainage and corrosion plan can trap water at the steel and complicate future replacement. A practical correction is to pause at the point where the condition becomes visible, document it with a measurement or photograph, and resolve the cause before adding more finish material. If the finding affects structure, fall protection, electrical work, or code approval, send it to the qualified designer or local authority rather than improvising a field change.
Example of a useful project note
For example, if a contractor proposes a change after opening the work area, note the original condition, the proposed detail, the product or drawing used to support it, and the person who approved the change. Then inspect the completed interface before trim, soil, siding, flooring, or stored items make it difficult to see. This record is more useful than a photo without a location or a verbal instruction that cannot be checked later.
Project-specific checks for concrete for steel fence posts
Fence conditions change at corners, gates, slopes, property transitions, and material changes. Lay those points out before setting posts so panel widths and gate hardware can fit without improvised cuts. Check the ground at the bottom edge, the direction of gate travel, the post support, and how runoff continues along the boundary. Document the finished fence line and any approved change from the plan.
What to verify before the work is concealed
Inspect the location and continuity of each connection, the fit at edges and corners, and any route for water, movement, or access. Confirm that the installed material matches the product data and approved scope. Where a detail is hidden later by trim, soil, a panel, a membrane, or stored contents, take a record before closing it and identify the inspection or approval that applies.
Check soil behavior, water exposure, fence height and wind exposure, post coating, embedment detail, and the gate or panel loads carried by the post. Pair that information with the field condition rather than relying on a generic illustration. If the measured result differs from the plan, record the difference and get the responsible reviewer’s direction before work continues.
- Photograph the relevant interface with a location and date.
- Record the product, finish, and fastener actually installed.
- Note any deviation, approval, inspection, or repair still outstanding.
- Keep access open until the responsible reviewer accepts concealed work.
Conclusion
Using cement for steel fence posts offers significant advantages in terms of stability, longevity, and uniform support. However, alternatives like gravel, concrete mixes, and metal post anchors can also be effective, depending on the specific needs of your project. By following best practices and addressing common issues, you can ensure a successful installation that meets your requirements.

Leave a Reply
Want to join the discussion?Feel free to contribute!