
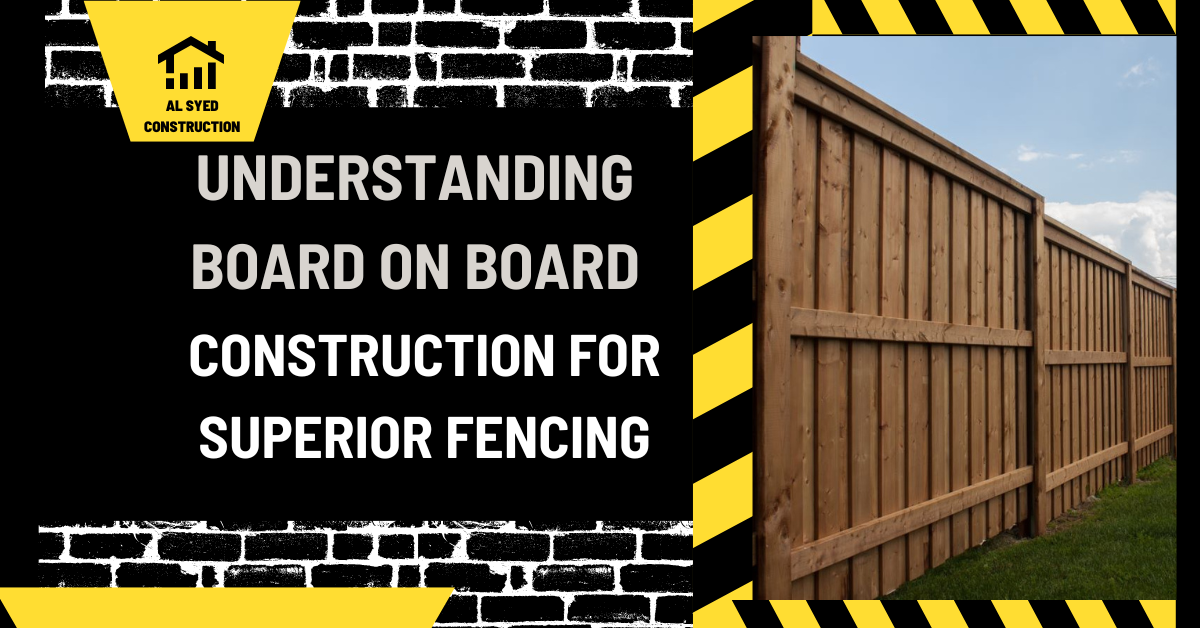
Board-on-Board Fence: Privacy, Design, and Build
In brief. Board-on-board fencing uses overlapping boards on alternating sides of the rails to reduce direct sightlines. The layout, fasteners, framing, finish, and gate details determine how well the fence performs.
When it comes to fencing, board on board construction is a popular choice due to its durability, privacy, and aesthetic appeal. This construction style involves overlapping boards, creating a solid barrier that offers both security and beauty to your property. In this comprehensive guide, we delve deep into the world of board on board fencing, exploring its benefits, installation process, and maintenance tips.
Benefits of Board on Board Fencing
Board on board fencing offers several advantages over other fencing styles. One of the key benefits is privacy. The overlapping design of the boards ensures that there are no gaps, providing you with a secluded outdoor space. This makes board on board fencing an ideal choice for residential properties where privacy is a priority.
Another advantage of board on board fencing is its durability. The overlapping design not only enhances the strength of the fence but also helps it withstand harsh weather conditions. This means that your fence will last longer and require less maintenance compared to other fencing styles.
In addition to privacy and durability, board on board fencing also offers aesthetic appeal. The overlapping boards create a visually appealing pattern that can enhance the overall look of your property. This makes board on board fencing a popular choice for homeowners who want to improve the curb appeal of their homes.
Installation Process
Installing a board on board fence requires careful planning and attention to detail. Here is a step-by-step guide to help you install your board on board fence:
Planning: Start by determining the layout of your fence and marking the locations of the fence posts. Make sure to check local regulations regarding fence height and property lines.
Digging Holes: Use a post hole digger to dig holes for the fence posts. The depth of the holes will depend on the height of your fence and the type of soil in your area.
Installing Posts: Place the fence posts in the holes and fill them with concrete to secure them in place. Use a level to ensure that the posts are straight and plumb.
Attaching Rails: Once the posts are in place, attach horizontal rails to the posts using screws or nails. These rails will provide support for the fence boards.
Installing Boards: Finally, attach the fence boards to the rails, overlapping them to create a solid barrier. Use screws or nails to secure the boards in place, making sure to leave no gaps between them.
Finishing Touches: Once the boards are in place, add any finishing touches such as post caps or paint to enhance the appearance of your fence.
Maintenance Tips
To ensure that your board on board fence remains in top condition, it is important to follow these maintenance tips:
Regular Inspections: Periodically inspect your fence for any damage or signs of wear and tear. Replace any damaged boards or hardware immediately to prevent further damage.
Cleaning: Clean your fence regularly to remove dirt, debris, and mildew. Use a mild detergent and water to scrub the fence, then rinse it thoroughly with clean water.
Sealing: Consider applying a sealant to your fence to protect it from moisture and UV rays. This will help prolong the life of your fence and keep it looking new for longer.
Trimming: Trim any vegetation near your fence to prevent it from growing into the boards. This will help maintain the integrity of your fence and prevent damage.
| Review point | What to verify |
|---|---|
| Layout | Verify boundary, utilities, slope, and gate openings. |
| System | Coordinate posts, rails, panels, and fasteners. |
| Closeout | Check latches, transitions, finish, and drainage. |
Posts, infill, and gates should be specified as one fence system; use board-on-board fence calculator and fence picket definition to coordinate the adjacent choices.
Turn the fence concept into a buildable layout
Board-on-board fencing uses overlapping boards on alternating sides of the rails to reduce direct sightlines. The layout, fasteners, framing, finish, and gate details determine how well the fence performs. Use the topic as a decision to verify on the actual site, not as a universal detail copied from an unrelated project.
Set the fence line, post locations, board overlap, finished height, gate openings, grade transitions, and both-side appearance before estimating material. Write the assumption beside the measurement or drawing that supports it. This makes it easier for an owner, designer, installer, and inspector to see what has been decided and what still needs confirmation.
For fence work, start with the surveyed line and walk the proposed route. Soil, slope, wind exposure, vegetation, utilities, gate openings, and neighboring conditions can change post locations and panel choices. A fence that looks continuous on a plan may need stepped or raked sections in the field, and each transition should maintain the intended privacy, containment, or safety function.
Turn the plan into field checks
Start by recording the existing condition and the intended result. Compare the proposed work with the adjacent surface, support, opening, boundary, or drainage path. Confirm that the selected product and connection belong to the same system, then identify which work must be inspected before it is covered. These checks prevent a good-looking finish from hiding a weak interface or an unresolved water path.
| Review point | What to verify |
|---|---|
| Layout | Verify boundary, utilities, slope, and gate openings. |
| System | Coordinate posts, rails, panels, and fasteners. |
| Closeout | Check latches, transitions, finish, and drainage. |
Sequence the work around hold points
- Confirm the site measurements, existing material, and intended use before ordering or demolition.
- Resolve the structural, drainage, access, boundary, or code question that controls the layout.
- Check product instructions and approved drawings before cutting, fastening, placing concrete, or closing an enclosure.
- Inspect connections, edges, transitions, and water movement while each item remains visible.
- Record the final product, changes, approvals, and maintenance requirements for the next owner or contractor.
Failure pattern to prevent
Estimating board count from fence length alone can miss overlap, end conditions, waste, and the extra framing or hardware around gates. A practical correction is to pause at the point where the condition becomes visible, document it with a measurement or photograph, and resolve the cause before adding more finish material. If the finding affects structure, fall protection, electrical work, or code approval, send it to the qualified designer or local authority rather than improvising a field change.
Example of a useful project note
For example, if a contractor proposes a change after opening the work area, note the original condition, the proposed detail, the product or drawing used to support it, and the person who approved the change. Then inspect the completed interface before trim, soil, siding, flooring, or stored items make it difficult to see. This record is more useful than a photo without a location or a verbal instruction that cannot be checked later.
Project-specific checks for board-on-board fence
Fence conditions change at corners, gates, slopes, property transitions, and material changes. Lay those points out before setting posts so panel widths and gate hardware can fit without improvised cuts. Check the ground at the bottom edge, the direction of gate travel, the post support, and how runoff continues along the boundary. Document the finished fence line and any approved change from the plan.
What to verify before the work is concealed
Inspect the location and continuity of each connection, the fit at edges and corners, and any route for water, movement, or access. Confirm that the installed material matches the product data and approved scope. Where a detail is hidden later by trim, soil, a panel, a membrane, or stored contents, take a record before closing it and identify the inspection or approval that applies.
Set the fence line, post locations, board overlap, finished height, gate openings, grade transitions, and both-side appearance before estimating material. Pair that information with the field condition rather than relying on a generic illustration. If the measured result differs from the plan, record the difference and get the responsible reviewer’s direction before work continues.
- Photograph the relevant interface with a location and date.
- Record the product, finish, and fastener actually installed.
- Note any deviation, approval, inspection, or repair still outstanding.
- Keep access open until the responsible reviewer accepts concealed work.
Records, follow-up, and maintenance
Closeout should capture the measurements, product names, drawings, approvals, inspection results, and any maintenance instructions that affect board-on-board fence. Keep the records together with photographs of concealed conditions and contact details for the installer or supplier. A clear record helps diagnose later movement, water entry, finish wear, or replacement needs without guessing how the original work was assembled.
Set a follow-up inspection based on exposure and use. After severe weather, seasonal movement, or a change in how the area is used, look again at the interface that carries the greatest risk. Correct loose, damaged, or blocked details early, and address the cause rather than covering the symptom with a new finish.
Common questions
What should be checked first for board-on-board fence?
Board-on-board fencing uses overlapping boards on alternating sides of the rails to reduce direct sightlines. The layout, fasteners, framing, finish, and gate details determine how well the fence performs. Then verify the controlling site measurement and the interface that will be hidden or loaded by the work.
Can one detail be used on every project?
No. Use the project’s actual substrate, exposure, intended use, approved design, product directions, and local requirements. A detail that works on one deck, porch, fence, or site condition may not transfer to another.


Leave a Reply
Want to join the discussion?Feel free to contribute!