
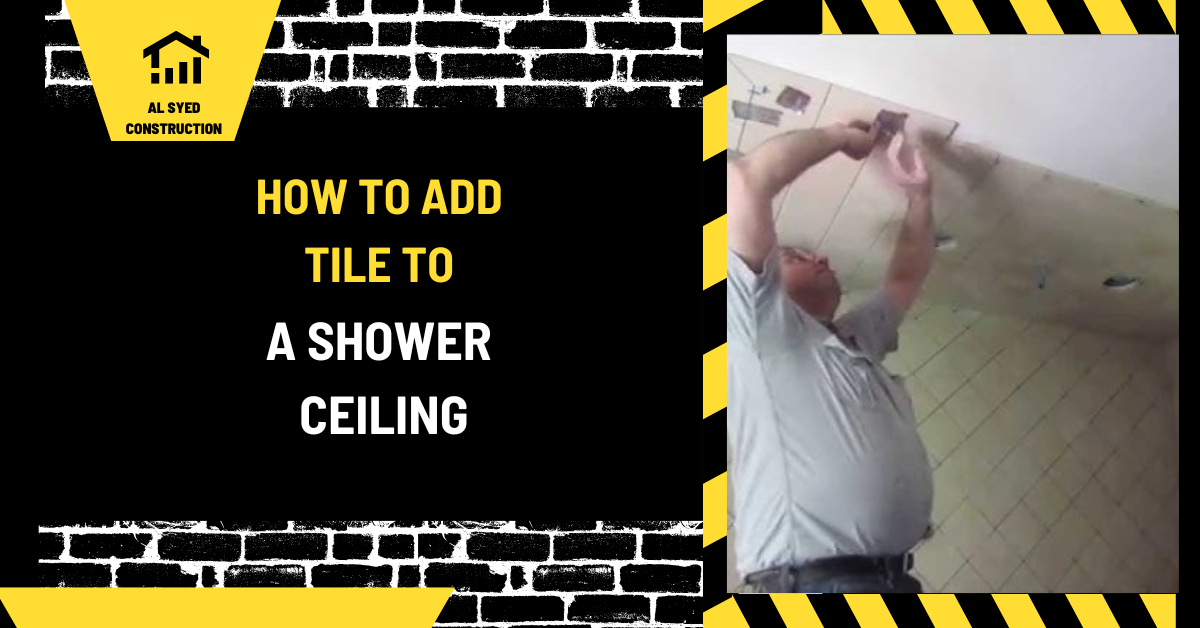
How to Tile a Shower Ceiling: Planning and Steps
Is a tiled shower ceiling right for the space?
A tiled shower ceiling can create a continuous finish and protect the overhead surface from routine moisture, but it adds weight and installation complexity. It is especially important in enclosed showers and steam rooms, where water vapor can reach the ceiling assembly. Decide the finish during design so framing, backer, waterproofing, ventilation, lighting, and tile format can be coordinated. If the project is a steam shower, use an assembly designed for vapor management across the ceiling and walls. Confirm the plan with a qualified tile professional before work begins.
Check framing and overhead support
Tile should be installed over a stable, suitable ceiling substrate that can carry the tile assembly. Confirm joist or framing spacing, panel thickness, fastener schedule, and deflection limits from the design and system instructions. Heavy or large tile may need additional support. Do not tile over a sagging, loose, water-damaged, or inadequately supported ceiling. Locate blocking for lights, vents, and accessories before closing the surface. If framing must be modified, obtain design approval rather than cutting or notching structural members in the field.
Prepare the substrate
The ceiling surface should be flat, clean, dry, and compatible with the waterproofing and setting materials. Install the specified backer board or waterproof panel using the correct fasteners and joint treatment. Cementitious board is not automatically waterproof; a wet-area ceiling may require a membrane or integrated system. Keep joints and penetrations consistent with the manufacturer detail. Inspect the substrate before waterproofing and correct unevenness within the product limits. A ceiling out of plane can make tile alignment and bond more difficult.
Waterproof and manage vapor
A shower ceiling is part of the wet-area assembly. The waterproofing layer must connect continuously to the walls and cover penetrations according to the approved system. A steam shower may also require vapor-retarding properties across all exposed surfaces. Follow one compatible system and its instructions; do not combine unrelated membranes, drains, and sealants without written approval. Allow the specified cure before setting tile and complete any required inspection or water test. The site’s page on moisture-prone tiled walls explains why tile itself is not the waterproof layer.
Select tile and mortar for overhead work
Choose a tile size, weight, and finish suitable for an overhead installation. Verify that the mortar is approved for the tile, substrate, and ceiling orientation, including any sag-resistance requirements. The manufacturer’s instructions govern trowel, coverage, open time, and cure. Do not use a product simply because it works on a wall. Very large or heavy pieces may require a different installation approach or a professional crew with overhead experience. Plan a sample to check color, grout joints, and light reflection before starting.
Set out the ceiling layout
Measure the ceiling and locate lights, vents, shower heads, and the wall-to-ceiling perimeter. Dry-lay the pattern to avoid narrow slivers at the edges and awkward cuts around fixtures. Align ceiling joints with wall joints only when the tile size and framing permit a good result. Decide where movement joints occur and how the ceiling perimeter meets the wall tile. A level control line and reference marks help keep rows straight. The shower tile calculator can estimate quantity, but include cuts and overage from the actual layout.
Install tile safely overhead
Overhead tile work requires stable access, a clean work area, and the right support method. Use a secure platform or scaffold rather than balancing on a tub or ladder. Follow the mortar instructions and set only the area that can be covered within the open time. Press tile firmly into the mortar and use spacers or temporary support as required. Keep hands clear of falling material and protect the shower pan. For larger pieces, use enough trained installers to handle and support the tile safely. Stop if pieces slide or the bond does not hold.
Grout, sealant, and cure
After the mortar reaches the required cure, grout the joints with a product compatible with tile and exposure. Use flexible sealant or a movement profile at changes of plane where specified. Avoid filling perimeter movement gaps with rigid grout. Protect the ceiling from water exposure until mortar, grout, and sealant cure. Maintain ventilation and temperature as directed. Do not use the shower early because trapped moisture can weaken the installation or affect the waterproofing system.
Common mistakes and warning signs
Common problems include an unsupported substrate, using wall-only mortar overhead, failing to waterproof penetrations, starting before membrane cure, poor layout around fixtures, and inadequate access support. If tile slides, cracks, sounds hollow, or separates, stop use and have the installation inspected. Do not add adhesive from the face to hold a loose tile. Determine whether the issue is substrate movement, mortar coverage, or moisture before repair. A tiled ceiling is overhead, so any loose material should be treated promptly.
Frequently asked questions
Can any tile go on a shower ceiling? No. Confirm weight, size, substrate, mortar, and system approval.
Does cement board waterproof a shower ceiling? Not by itself in many systems; follow the complete wet-area assembly.
Should a steam shower ceiling be tiled? It can be, but the assembly needs appropriate vapor management and detailing.
How long before using the shower? Follow the cure times for membrane, mortar, grout, and sealant products.
Before starting checklist
Confirm framing support, substrate, waterproofing, vapor requirements, tile, mortar, layout, fixtures, access platform, movement joints, cure schedule, and inspections. Read every product instruction and use a qualified installer for overhead or steam-shower work. Proper support and a continuous water-managed assembly matter more than the visual tile alone.
Ventilation and condensation
A tiled ceiling does not remove the need for bathroom ventilation. Coordinate an exhaust fan or ventilation system with the ceiling tile layout so that the grille, duct, and waterproofing details remain accessible and sealed. Steam and condensation can affect the assembly and adjacent rooms. Confirm that the fan is rated and ducted for the design, and that control timing supports moisture removal. A steam shower requires a purpose-designed vapor-control assembly, not simply more grout or sealant.
Lighting and fixture penetrations
Recessed lights, speakers, shower heads, and fans create penetrations in the ceiling. Use fixtures suitable for the location and integrate each opening with the waterproofing detail. Coordinate tile cuts with fixture trim so the finish remains neat. Do not drill through a membrane after installation without a system-approved sealing method. Keep access to serviceable components. The electrical and tile trades should review fixture positions before the ceiling is tiled.
Tile size, weight, and support method
The selected tile should be manageable overhead and approved for the substrate and mortar. Small-format tile may reduce handling challenges, while large panels require multiple installers and temporary support. Verify that the system can hold the tile in the ceiling orientation during installation and cure. Do not rely on tape or improvised props that can damage the finish or fall. Plan how each piece will be lifted, aligned, and pressed into the mortar safely.
Layout at the perimeter and joints
Use a dry layout to balance the cuts at both sides of the shower. Decide whether ceiling joints align with wall joints and how the corners will be finished. Leave the movement joint required at the ceiling-to-wall change of plane. Use a compatible flexible sealant where specified. Avoid tiny slivers around fixtures by shifting the layout before mortar is applied. A plumb and level reference line makes the pattern easier to maintain overhead.
Inspection and maintenance after installation
Before use, inspect the ceiling for loose tile, open joints, incomplete sealant, and water staining. Follow cure times for all products. Periodically check sealant and ventilation operation. If a tile sounds loose or shifts, stop using the shower and have it inspected; overhead pieces can fall. Keep product names and installation photographs so future repair can use compatible materials and preserve waterproofing.
Temperature and ventilation during cure
Maintain temperature and airflow within the setting-material and waterproofing instructions during installation and cure. Excess heat, cold, or drafts can shorten working time or delay curing. Keep the shower dry and isolated from other trades. Record the date each layer is installed and when it is ready for the next step. Do not use a portable heater near wet materials unless the product and safety plan allow it.
Protect the pan and finished walls
Cover the shower pan with clean protection that does not trap moisture or scratch the finish. Use padded ladders or platforms and keep tools from striking wall tile. Avoid storing heavy tile boxes on a fragile pan or curb. Remove mortar drips promptly using an approved method. The ceiling crew should coordinate access with the wall and floor installers so earlier work is not damaged.
Professional installation and inspection
Overhead tile in a wet enclosure combines falling-object risk, waterproofing, and finish precision. Use a qualified installer who can show how the substrate, membrane, and mortar are approved for ceiling use. Ask for inspection of concealed waterproofing before tile. If the project is a steam shower, have the designer confirm vapor-control details. These checks reduce the chance of a costly leak or loose tile after occupancy.


Leave a Reply
Want to join the discussion?Feel free to contribute!