
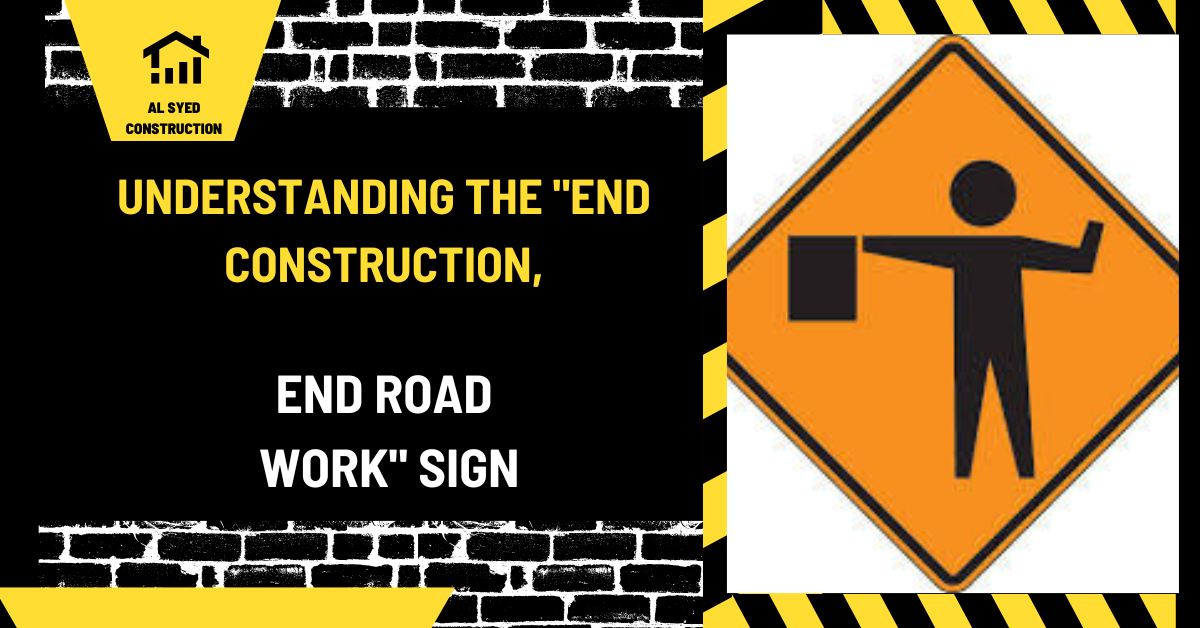
End Road Work Sign: Meaning and Use
This article focuses on end road work sign. The practical guidance explains how the topic affects scope, materials, field coordination, quality checks, and maintenance. Decisions depend on the site, intended use, approved documents, adjacent features, and the people responsible for design and construction. Confirm project-specific engineering, contract, and current local requirements with the responsible professional.
1. What Does the “End Construction, End Road Work” Sign Indicate?
**1.1 Sign Description and Purpose
The “End Construction, End Road Work” sign is a standard traffic control sign used to signal that road construction or maintenance activities have been completed. This sign typically features a rectangular or square shape with clear, bold text indicating the end of the construction zone. Its primary purpose is to:
- Notify Drivers: Inform drivers that they are leaving the construction area and normal road conditions are resuming.
- Reduce Confusion: Prevent confusion by clearly indicating that the temporary changes to road conditions are over.
**1.2 Common Variations
- End Road Work: A straightforward sign that indicates the conclusion of roadwork activities.
- End Construction Zone: This variant emphasizes the end of a designated construction area.
2. Why is the “End Construction, End Road Work” Sign Important?
**2.1 Restoring Normal Traffic Flow
The “End Construction, End Road Work” sign is crucial for restoring normal traffic flow after a construction project. It helps:
- Signal the Return to Normal Conditions: Drivers can return to regular speeds and lane usage.
- Minimize Disruption: Reduces the likelihood of delays and confusion as drivers transition out of the construction zone.
**2.2 Improving Driver Safety
By clearly marking the end of roadwork, the sign:
- Prevents Accidents: Reduces the risk of accidents caused by sudden changes in road conditions.
- Enhances Driver Awareness: Ensures drivers are aware that construction-related hazards are no longer present.
3. Key Elements of the “End Construction, End Road Work” Sign
**3.1 Design and Visibility
The effectiveness of the “End Construction, End Road Work” sign depends on its design and visibility. Key elements include:
- Shape and Color: Typically rectangular with a standard color scheme to ensure high visibility.
- Text Clarity: Bold, clear text to convey the message quickly and effectively.
- Reflective Materials: Use of reflective materials to maintain visibility in low-light conditions.
**3.2 Placement and Location
Proper placement of the “End Construction, End Road Work” sign is essential for its effectiveness:
- At the End of the Construction Zone: Positioned at the point where construction or roadwork ends.
- Before Major Intersections: To guide drivers as they approach intersections or merge onto other roads.
- In High-Traffic Areas: To ensure the sign is seen by all drivers exiting the construction zone.
4. What to Expect When You See the “End Construction, End Road Work” Sign
**4.1 Return to Normal Road Conditions
Upon seeing the “End Construction, End Road Work” sign, drivers can expect:
- Normal Speed Limits: Speed limits revert to pre-construction levels.
- Standard Lane Usage: Lanes that may have been closed or redirected are now available for normal use.
- Removal of Construction Equipment: Construction machinery and barriers are no longer present on the road.
**4.2 Navigating Out of the Construction Zone
Drivers should:
- Follow Posted Speed Limits: Adhere to speed limits that may have changed back to their original values.
- Stay Alert: Remain cautious as the transition from a construction zone may still require some adjustment.
5. The Role of the “End Construction, End Road Work” Sign in Road Safety Management
**5.1 Regulatory Standards and Guidelines
The usage and placement of the “End Construction, End Road Work” sign are governed by various regulatory standards, including:
- Manual on Uniform Traffic Control Devices (MUTCD): Provides guidelines for the design and placement of traffic control devices.
- Local Traffic Regulations: May include additional requirements specific to the jurisdiction.
**5.2 Integration with Traffic Management Systems
The “End Construction, End Road Work” sign is often part of a broader traffic management strategy:
- Coordination with Traffic Signals: Adjustments to traffic signals may be made to accommodate the end of construction.
- Use of Variable Message Signs (VMS): Complementary electronic signs may provide real-time updates about road conditions.
6. Impact of the “End Construction, End Road Work” Sign on Different Areas
**6.1 Urban Areas
In urban areas, the “End Construction, End Road Work” sign helps manage the complexities of high traffic volumes:
- Effective Transition: Assists in the smooth transition from construction zones back to regular traffic patterns.
- Minimizing Disruption: Reduces the impact on local businesses and commuters.
**6.2 Rural Areas
In rural areas, the sign plays a crucial role in managing less frequent but potentially disruptive roadwork:
- Clear Communication: Ensures that drivers are aware of the end of long construction zones.
- Facilitating Efficient Travel: Helps in managing the flow of traffic in less densely populated areas.
Conclusion
The “End Construction, End Road Work” sign is a vital component of road safety and traffic management. By clearly marking the conclusion of construction activities, it helps restore normal traffic conditions, enhance driver safety, and minimize disruptions. Understanding the significance of this sign and its proper usage is essential for both drivers and road management professionals.
Define the scope and expected result
Begin with the actual question behind end road work sign. Identify whether the work is new construction, repair, measurement, status checking, service planning, or maintenance. State the location, limits, intended use, and expected result in plain language. This distinction matters because a general definition cannot approve a site detail, a rough estimate cannot replace a written scope, and a map observation cannot confirm the status of every work zone.
For the work zone, task, equipment path, traffic interface, and public route, mark what is included, what remains in place, and where another owner or trade takes over. Capture the condition before work, note access that must remain available, and identify open decisions. Where a boundary, elevation, term, or responsibility is uncertain, record the question and obtain direction before ordering material or changing the field condition.
Confirm the controlling information
Before selecting a method, review approved traffic plan, shift briefing, visibility, access, hazards, equipment, and responsible supervisor. Check that the plans, quantities, and communications refer to the same revision and location. Record the source and date of information that can change, such as a field measurement, traffic condition, service request, or local requirement. Separate verified facts from assumptions so a later decision can be traced to its basis.
Use a site walk to compare the documents with actual conditions. Photograph interfaces, identify nearby utilities and drainage features, and note constraints on equipment, storage, work hours, and public access. If the information is incomplete, determine whether a survey, test, agency response, or qualified design review is needed. Do not make an unapproved substitution simply because a detail is difficult to build as drawn.
Compare options as complete systems
Evaluate the approved separation, signs, barriers, communication, trained assignments, and stop-work response. Compare function, supporting layers, edges, interfaces, drainage, installation method, inspection, and maintenance together. Product labels and familiar field terms do not establish that two assemblies are equivalent. Check approved submittals and product instructions, then ask the responsible professional to review a proposed alternative that could affect design intent, performance, appearance, or acceptance.
For the work zone, task, equipment path, traffic interface, and public route, weigh the site conditions and owner needs rather than choosing only by appearance or a headline estimate. Consider traffic, weather, water, access, maintenance capacity, and future work. If a product is unavailable or a method changes, document the replacement, its compatibility, and any revised inspection or schedule requirement. This gives the owner a reasoned comparison without assuming that the most expensive option is automatically best.
Plan the work sequence and handoffs
Build the sequence around brief, inspect, establish controls, separate people and equipment, monitor changes, and secure the site. Identify prerequisites, access, equipment, materials, inspection hold points, and the person responsible for each handoff. Schedule work that will be concealed for review before the next operation begins. Tell the next trade what has been completed and what must remain protected. A coordinated sequence reduces rework and makes it easier to identify the source of a defect.
Allow the plan to respond to real conditions without losing control of the change. Weather, deliveries, utilities, ground conditions, public access, and approvals may shift the sequence. When that happens, protect the area, record the impact, obtain authorized direction, update the work record, and notify every affected crew. Do not leave a critical change in a text message or verbal conversation that the following shift cannot find.
Inspect work against observable criteria
Use the relevant documents to check device placement, visibility, stable transitions, equipment condition, exclusion area, and overnight protection. Confirm the measurement point, unit, test method, acceptance limit, and responsible reviewer before work begins. Tie each observation to a location, date, drawing revision, and material lot where applicable. A visual review is useful, but it cannot replace a specified test or approval. List each open item with an owner and a due date.
Inspect interfaces as carefully as the central surface or component. Edges, transitions, drains, covers, joints, access points, and adjacent materials often reveal whether the assembly is working as intended. Photograph defects with enough context to relocate them. If a result will soon be covered, pause and complete the required review first; otherwise, the team may lose the evidence needed to accept or correct the work.
Diagnose issues before choosing a repair
When a problem appears, describe its location, shape, extent, date, weather, traffic, and nearby construction activity. For the work zone, task, equipment path, traffic interface, and public route, investigate symptoms such as moved controls, blind reversing, unclear pedestrian detours, obsolete signs, and unreported near misses. Check whether the issue follows a joint, trench, edge, water path, material change, or work boundary. A symptom can have more than one cause, so avoid treating the visible mark as a complete diagnosis.
Compare the condition with survey data, inspection notes, service logs, and earlier repairs. Determine whether the issue is limited to a surface layer or may involve support, drainage, material compatibility, operation, or an unrecorded change. Use qualified engineering, geotechnical, materials, legal, or safety support where the decision requires it. Record the cause considered and why the repair selected matches that cause.
Coordinate people, access, and safety
Include hazard review, trained roles, communication, protective equipment, access separation, and changing conditions in the work plan. Identify who controls the area, how others are kept out of moving equipment or restricted routes, and how a person reports an unsafe change. Use the approved site, traffic, or employer safety plan and confirm that assigned personnel have the required training. A sign, barrier, or item of protective equipment does not replace the complete plan.
Give affected people clear information about timing, alternate access, restricted areas, and the contact for questions. Check the route from the user’s point of view, not only from the crew’s setup position. Reinspect after a shift change, equipment move, weather event, or new work phase. If the approved controls no longer fit, pause the affected task and get direction before continuing.
Manage cost, timing, and lifecycle effects
The result can depend on work phase, exposure, traffic, weather, public behavior, equipment, and corrective-action history. Record quantities, expected duration, inspection needs, access restrictions, material lead times, and maintenance responsibilities before making a budget or schedule commitment. For cost questions, compare current local proposals against the same written scope; broad online averages are not a reliable price for a particular site. For status or employment questions, confirm changing information with the responsible current source.
Plan for the work after installation or service, not only the initial activity. Identify routine inspections, cleaning, repair, seasonal preparation, and the party responsible for them. A lower initial cost can carry more maintenance or disruption, while a premium option may exceed the actual need. State the assumptions behind any lifecycle comparison and revisit them if use, traffic, climate, or ownership changes.
Prepare a useful handover record
Keep briefings, inspections, training, traffic changes, near misses, corrective actions, and handover notes together with the final work package. Make the record searchable by location and date, and label the revision, responsible person, and open item. Include approved changes and explain any temporary limitation. A folder of unlabelled photographs or duplicate drawings is difficult to use when a future crew needs to find a buried feature, verify a surface, answer a resident, or check an invoice.
At closeout, walk the work with the responsible party, confirm access and maintenance instructions, and assign unresolved items. Record the actual condition rather than copying the original plan as if nothing changed. Future repairs should use these records to understand the assembly and avoid incompatible work. A clear handover is part of the project result, not an administrative task to leave until after the crew has departed.
Frequently asked questions
What should be checked first for end road work sign?
Start with the current project documents, exact location, existing conditions, intended use, and responsible decision-maker. Confirm unresolved measurements, access, utilities, drainage, approvals, or service triggers before work or a public update proceeds.
What should happen if the field condition differs from the plan?
Document the location and condition, protect the affected area, notify the authorized professional, and obtain written direction before changing the work.
Related posts in Driveways, Roads & Paving
Continue with Understanding the "Road Construction Ahead" Sign, and Road Construction Sign Holder Pay, and Annual Fatalities in Road Construction for connected guidance within the same category.


Leave a Reply
Want to join the discussion?Feel free to contribute!