
What Is a 1½-Inch Board in Construction?
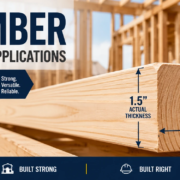
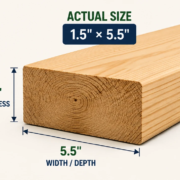
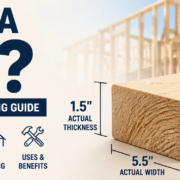
In U.S. construction, a board described as 1½ inches thick is often standard dressed lumber sold under a nominal 2-inch label, such as a 2-by-4. The nominal size refers to the category name; the surfaced board is commonly about 1½ inches thick. The width is a separate dimension: a nominal 2-by-4 is commonly about 3½ inches wide, while a nominal 2-by-6 is wider. Exact dimensions depend on product, moisture condition, supplier, and whether the stock is surfaced or rough sawn.
“1½-inch board” can also mean a custom board that is actually 1½ inches thick. Before ordering, confirm whether the dimension is nominal or actual, which side is the thickness, and what the lumber is intended to do. Thickness alone does not establish strength, grade, span, or suitability for a structural use.
Nominal and actual dimensions
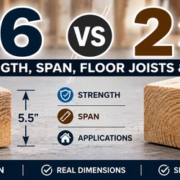
Dimensional lumber in the United States is commonly sold by nominal dimensions. The rough stock is dried and surfaced, so finished dimensions are smaller than the label. A nominal 2-by member is typically about 1½ inches thick after surfacing. The width depends on the nominal size: a common 2-by-4 is about 3½ inches wide, a 2-by-6 about 5½ inches, and a 2-by-8 about 7¼ inches. Verify current supplier dimensions because product type and treatment can affect final measurements.
A rough-sawn timber may be much closer to its named dimension than a surfaced board. Hardwood stock may use quarter-sawn thickness terms such as 4/4 or 8/4 rather than the standard softwood 2-by designation. A pressure-treated board may shrink after installation as it dries. A custom-milled piece may be ordered to a specified actual thickness.
Check a physical sample or product drawing before making a tight fit. A wall assembly’s total thickness also includes sheathing, drywall, cladding, or other layers, so a board’s face dimension is not the same as a finished wall measurement.
How 1½-inch boards are used
Nominal 2-by lumber is used in residential wall framing, floor framing, roof framing, blocking, and other structural assemblies when the design specifies it. A 1½-inch thickness alone does not make a board suitable for a joist, header, beam, or post. The species, grade, span, load, connection, support, and building requirements determine the member.
The same thickness can appear in nonstructural applications such as shelving, stair parts, trim backing, furniture, or shop-built components. In these uses, face width, appearance, stability, and fastening may matter more than a structural span. Use a straight, dry board with the finish quality needed for the visible surface.
Decking and outdoor projects may use nominal 2-by material, but the design must account for joist spacing, fasteners, water drainage, decay exposure, and treatment. A board that works as a deck surface is not automatically suitable for a beam or guardrail. Follow the plans and product label.
Species, grade, and treatment
Common framing species groups include SPF, Douglas fir, southern pine, and hem-fir, with regional availability. Strength and stiffness values differ by species and grade. A grade stamp identifies the grading agency, species or group, grade, and often seasoning or treatment information. Structural plans may call for a specific grade or approved equivalent.
Appearance lumber is selected for grain, knots, and finish, while structural lumber is graded for load-carrying characteristics. A smooth, knot-free board is not necessarily a structural grade. Do not substitute a finish board for specified framing because it happens to measure 1½ inches thick.
Pressure-treated wood is used where the exposure requires treatment under the design and applicable code. Verify the treatment category, ground-contact rating, and fastener compatibility. Treated wood can require corrosion-resistant connectors and special handling. A green tint alone does not confirm the treatment or its intended use.
Structural selection and span
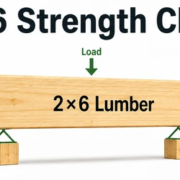
Member capacity depends on more than thickness. Joist selection includes span, spacing, species, grade, live and dead loads, deflection limits, bearing, and connections. A 1½-inch-thick board may be adequate in one assembly and inadequate in another. Use the approved drawings, code requirements, and span tables for the specific material rather than a generic rule of thumb.
Headers and beams often require built-up members or engineered lumber, not a single standard board. The connection to posts or walls and the bearing condition also matter. Do not cut, notch, or drill a structural member outside permitted limits. Engineered trusses and I-joists have manufacturer-specific hole and repair rules.
If an existing floor or roof appears to sag, do not add another board as a quick fix. Identify the framing, load path, and damage and consult a qualified structural professional. Reinforcement must transfer loads to appropriate supports.
Measure and order the right board
When requesting material, write the nominal size, actual required size if critical, species, grade, length, treatment, moisture condition, and finish. Specify whether the product is rough, surfaced on one or more sides, or factory-treated. Ask whether the listed dimension is the minimum dressed size or nominal designation.
Make a cut list for repeated parts and include allowances for knots, end checks, miters, and waste. Store boards flat and supported so they do not bow. Keep them dry and acclimate finish stock to the building conditions as directed. Inspect the delivery before it is installed, and separate damaged or incorrect material.
For a board that must fit a cabinet or custom trim detail, purchase a sample and measure it with a caliper or accurate rule. A small discrepancy can affect door clearances, reveals, and adjoining trim. Confirm the final thickness after any planing or sanding.
Installation and fastening
Lay out framing using a consistent reference line and check that boards are straight, plumb, and properly supported. Use fasteners and connectors specified for the assembly. Nail or screw through the required members, maintain edge distances, and avoid splitting. Keep fasteners clear of concealed utilities. Use blocking where panel edges or fixtures need support.
Wood changes dimension with moisture. Allow for movement in flooring, cladding, and trim details. Do not trap a floating floor under a board or base. For exterior work, shed water and protect end grain. Flash horizontal surfaces and maintain separation from soil or masonry where required.
Cut ends and holes in treated wood may need additional treatment according to product instructions. Avoid direct contact between incompatible metals and treated stock. Confirm connectors and fasteners are approved for the treatment type and exposure.
Maintenance and durability
Inspect exposed boards for moisture, insect damage, splits, loose fasteners, and finish failure. Repair the source of water before replacing a damaged piece. Exterior coatings should be maintained on the schedule recommended for the material and climate. Keep drainage paths clear around decks, siding, and trim.
For concealed framing, inspect before covering and photograph important connections. Keep receipts, grade-stamp details, and product records with the project documents. This helps future contractors understand what is in the structure.
Wood is durable when the species, grade, detailing, and exposure are appropriate. A thicker board is not automatically longer-lasting; drying, ventilation, drainage, and proper support matter as much as nominal size.
Common size and selection mistakes
Common errors include reading a nominal size as an actual one, assuming thickness tells the full board size, using an appearance board structurally, and ignoring treatment requirements. Others include ordering without a cut list, storing lumber in the rain, and installing wet material tightly against fixed surfaces.
Another mistake is using one board dimension as a design shortcut. The required member should be selected for load and span, and a finish part should be selected for its visible dimensions. Confirm intended use before purchase.
Frequently asked questions
Is a 1½-inch board the same as a 2-by?
It is commonly the actual thickness of surfaced nominal 2-by lumber, but the full size and product should be verified.
How wide is a 1½-inch board?
Thickness does not determine width. A nominal 2-by-4, 2-by-6, or 2-by-8 has a different face width.
Can 1½-inch lumber be structural?
Yes, when the species, grade, size, span, load, and connections meet the design requirements. Thickness alone is not enough.
Does treated lumber stay exactly 1½ inches thick?
Actual dimensions can vary and treated stock may shrink as it dries. Measure the delivered product before fitting.
Specialty stock and matching existing boards
A project may call for an actual 1½-inch-thick board rather than the finished thickness of standard 2-by lumber. Hardwood shops, sawmills, and specialty suppliers can provide rough or surfaced stock in custom dimensions. Specify the finished thickness after planing and sanding, the minimum width, species, grade, moisture condition, and length. Ask whether the supplier can provide a sample or machine a short piece to verify the fit.
When replacing a board in an older building, measure several locations because the original lumber may be rough sawn, hand-planed, or altered by years of shrinkage and repairs. Do not rely on one exposed edge if paint, plaster, or flooring hides part of the member. Photograph the assembly and confirm whether it is decorative or structural before removal.
For a visible repair, select a species and grain that can accept the same stain or paint. New wood may absorb finish differently from aged material, so test a sample. Keep a labeled offcut after installation for future patching.
Safe handling and site storage
Long boards can be heavy and awkward even when their cross-section is modest. Use a two-person lift or mechanical handling for long stock, and support it at enough points to prevent bending. Wear gloves when handling rough lumber and protect eyes when cutting. Follow tool safety directions and use dust extraction for sawing.
Store material away from standing water, masonry moisture, and direct heat. Keep it flat, stickered, and protected from weather while allowing ventilation. Do not stack extra boards on an attic floor, scaffold, or ceiling framing unless the structure is designed for that load. Remove damaged pieces from the installation pile so they are not accidentally used.




Leave a Reply
Want to join the discussion?Feel free to contribute!